Port Address Translation (PAT)
What’s a PAT? Well, I’m glad you asked. PAT is a type of network address translation that lets devices on a private network to share a single public IP address by using many different port numbers. It maps multiple private IP addresses and ports to a single IP address and a different port number for each connection. Exciting, I know!
We’re going to set up and configure a PAT using Cisco Packet Tracer. It might get a little complicated and tedious but I trust you’ll get it down. Are you ready? Let’s get started.

The Journey Begins
We’re going to get started by opening up Cisco Packet Tracer. Our goal for today is to set up a PAT and configure it.
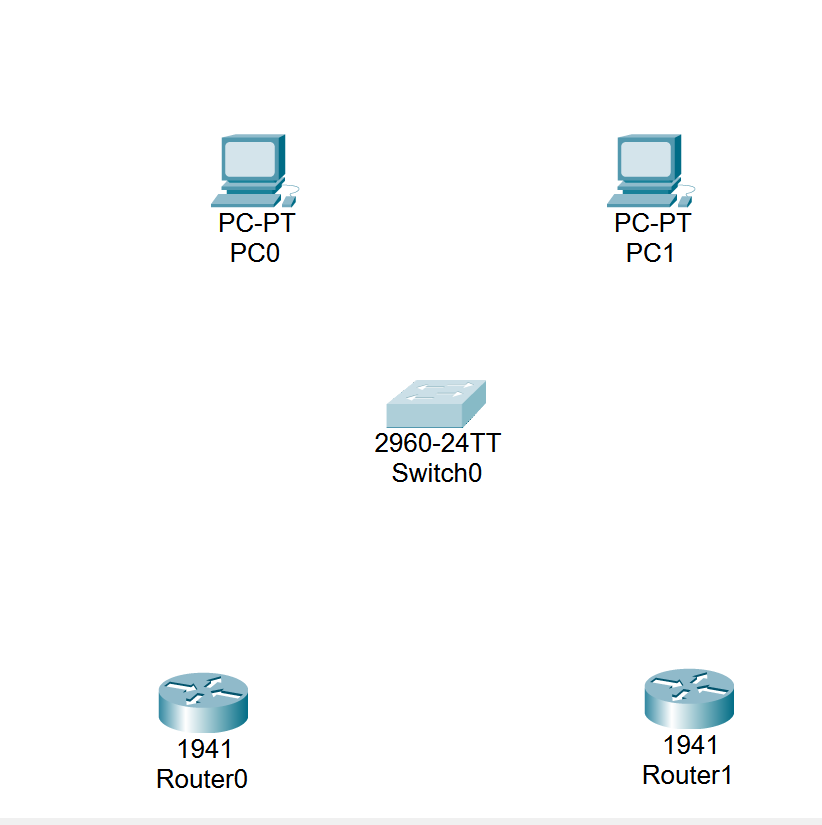
Step 1: Place 2 PC’s on the canvas.
Step 2: Place 1 switch on the canvas.
Step 3: Place 2 routers on the canvas.
This will be the framework of our network.
It’s Time to Make Connections
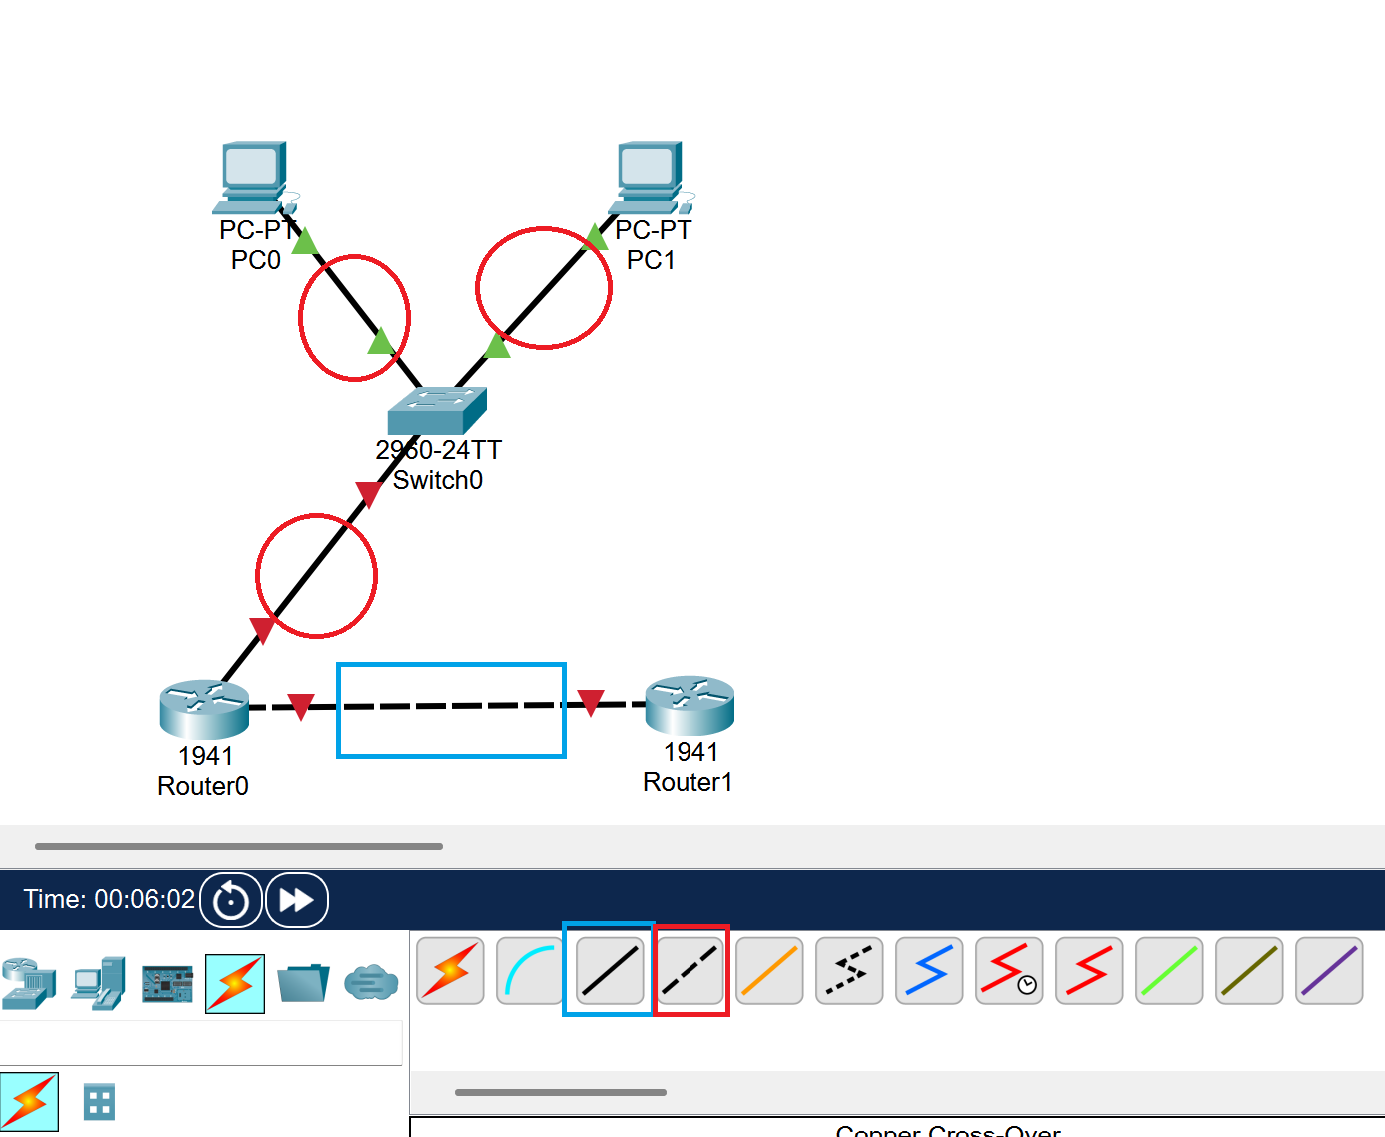
Next we’re going to connect our devices together with cable. In this screenshot example we’ll be using red for copper straight-through cable and blue for copper-cross over cable.
We’ll start off by using copper straight-through cable.
Step 1: Connect the PC’s to the switch with copper straight through.
Step 2: Connect the switch to Router 0 with copper straight through.
Step 3: Connect Router 0 to Router 1 with copper cross-over cable.
Configuration
Next we’ll configure our PC’s.
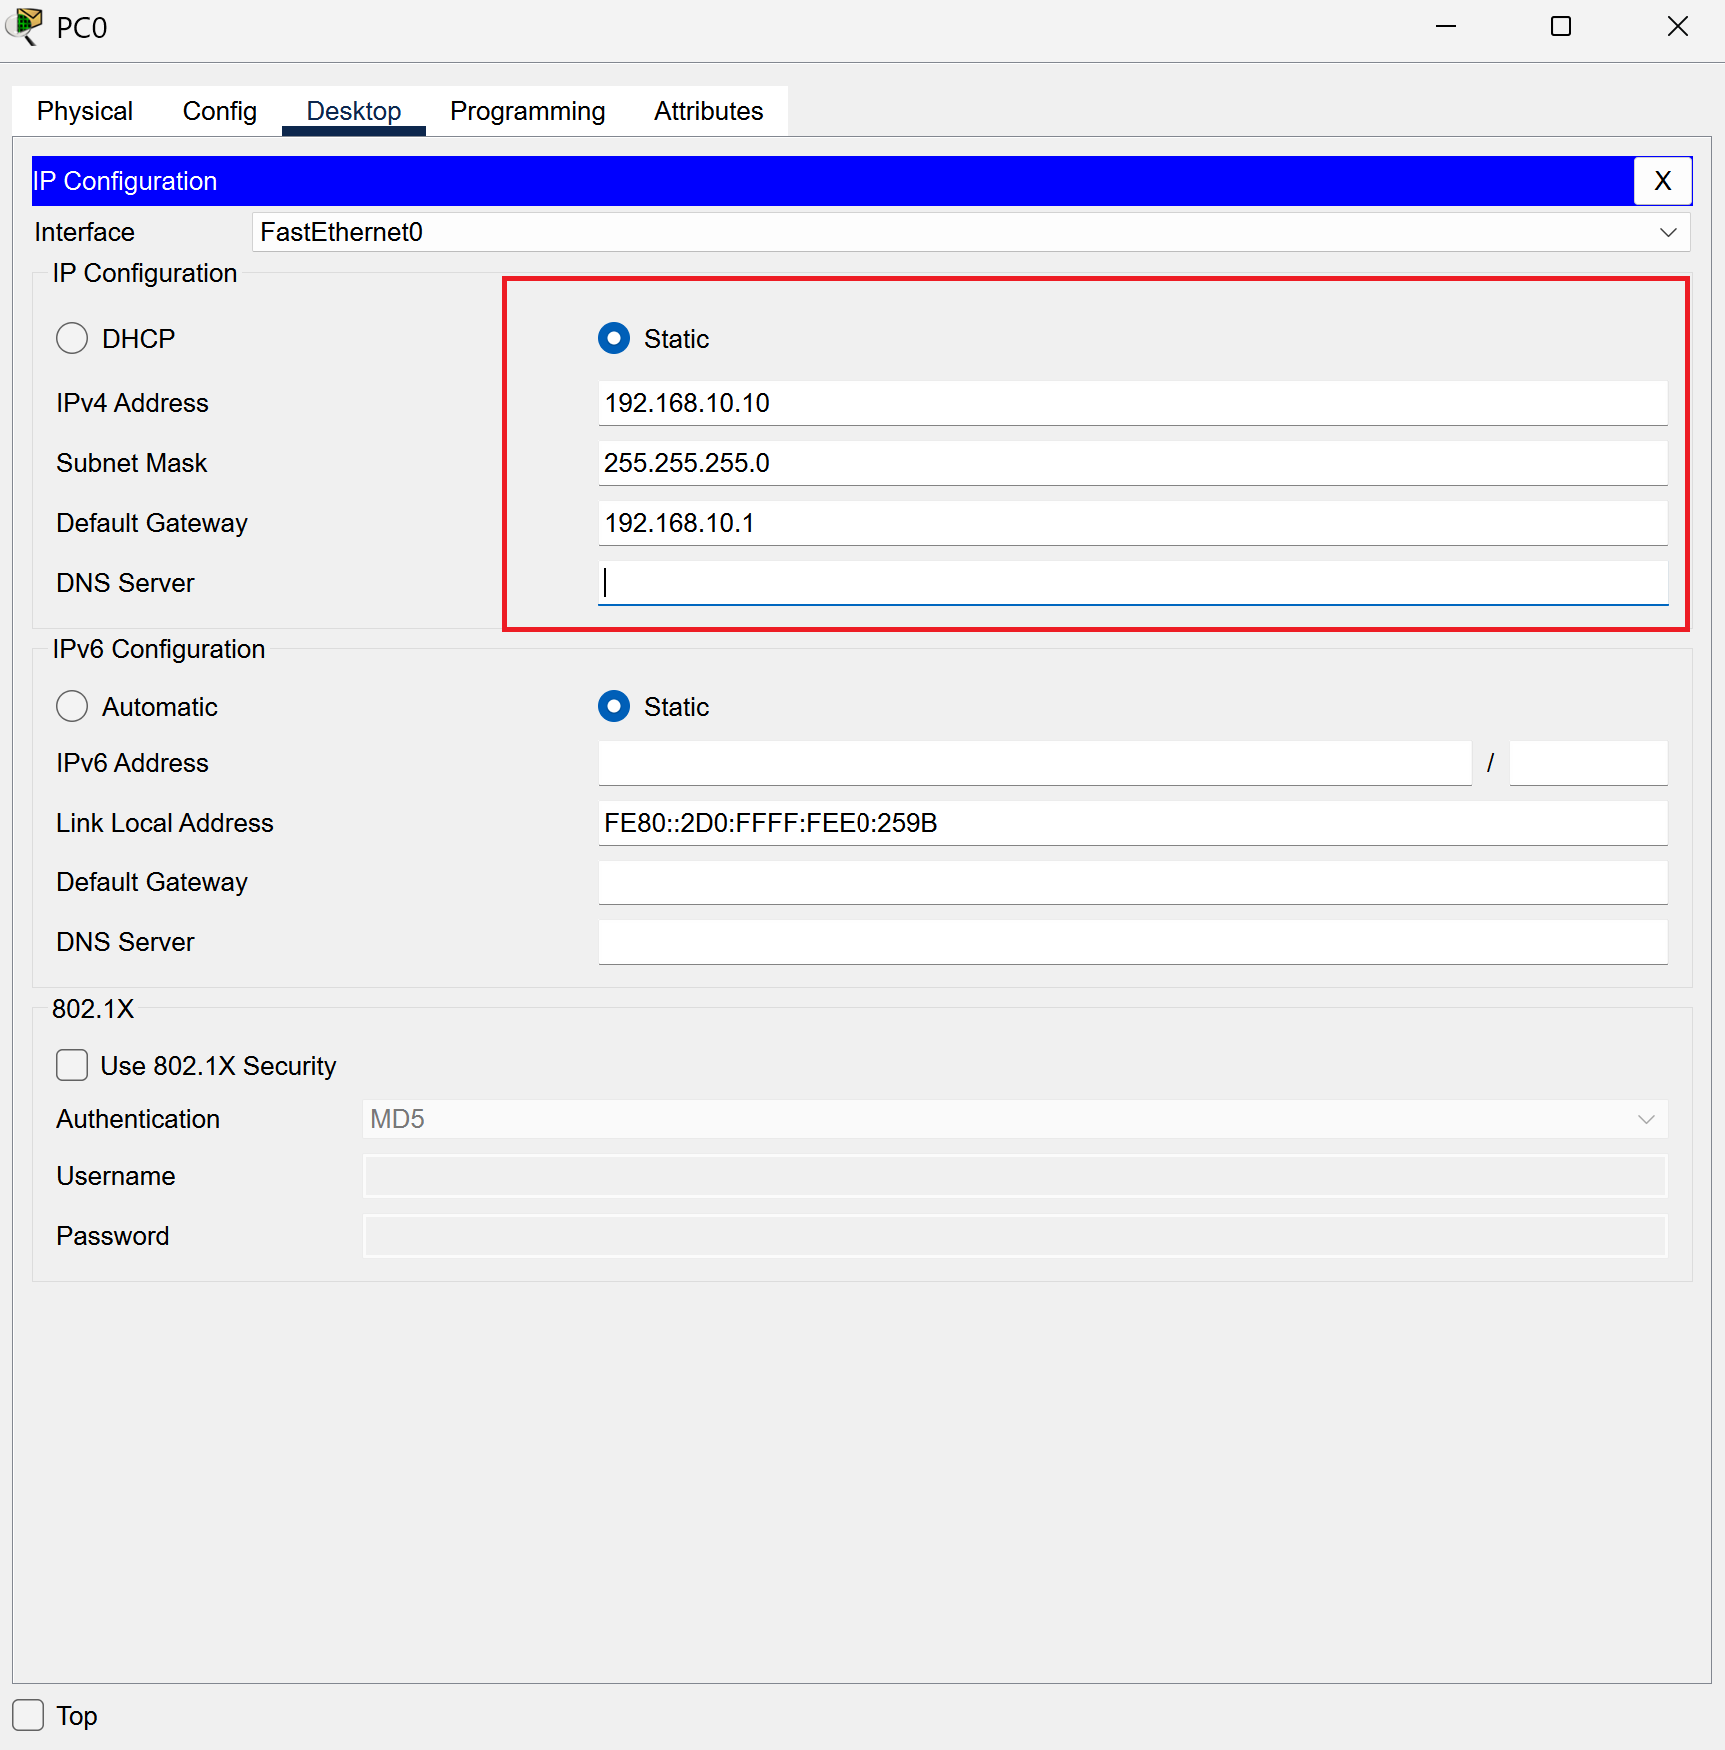
Head to PC0 and then desktop and ip configuration.
Fill in the box on your screen with the information provided.
Ipv4: 192.168.10.10 Subnet Mask: 255.255.255.0 Default Gateway: 192.168.10.1
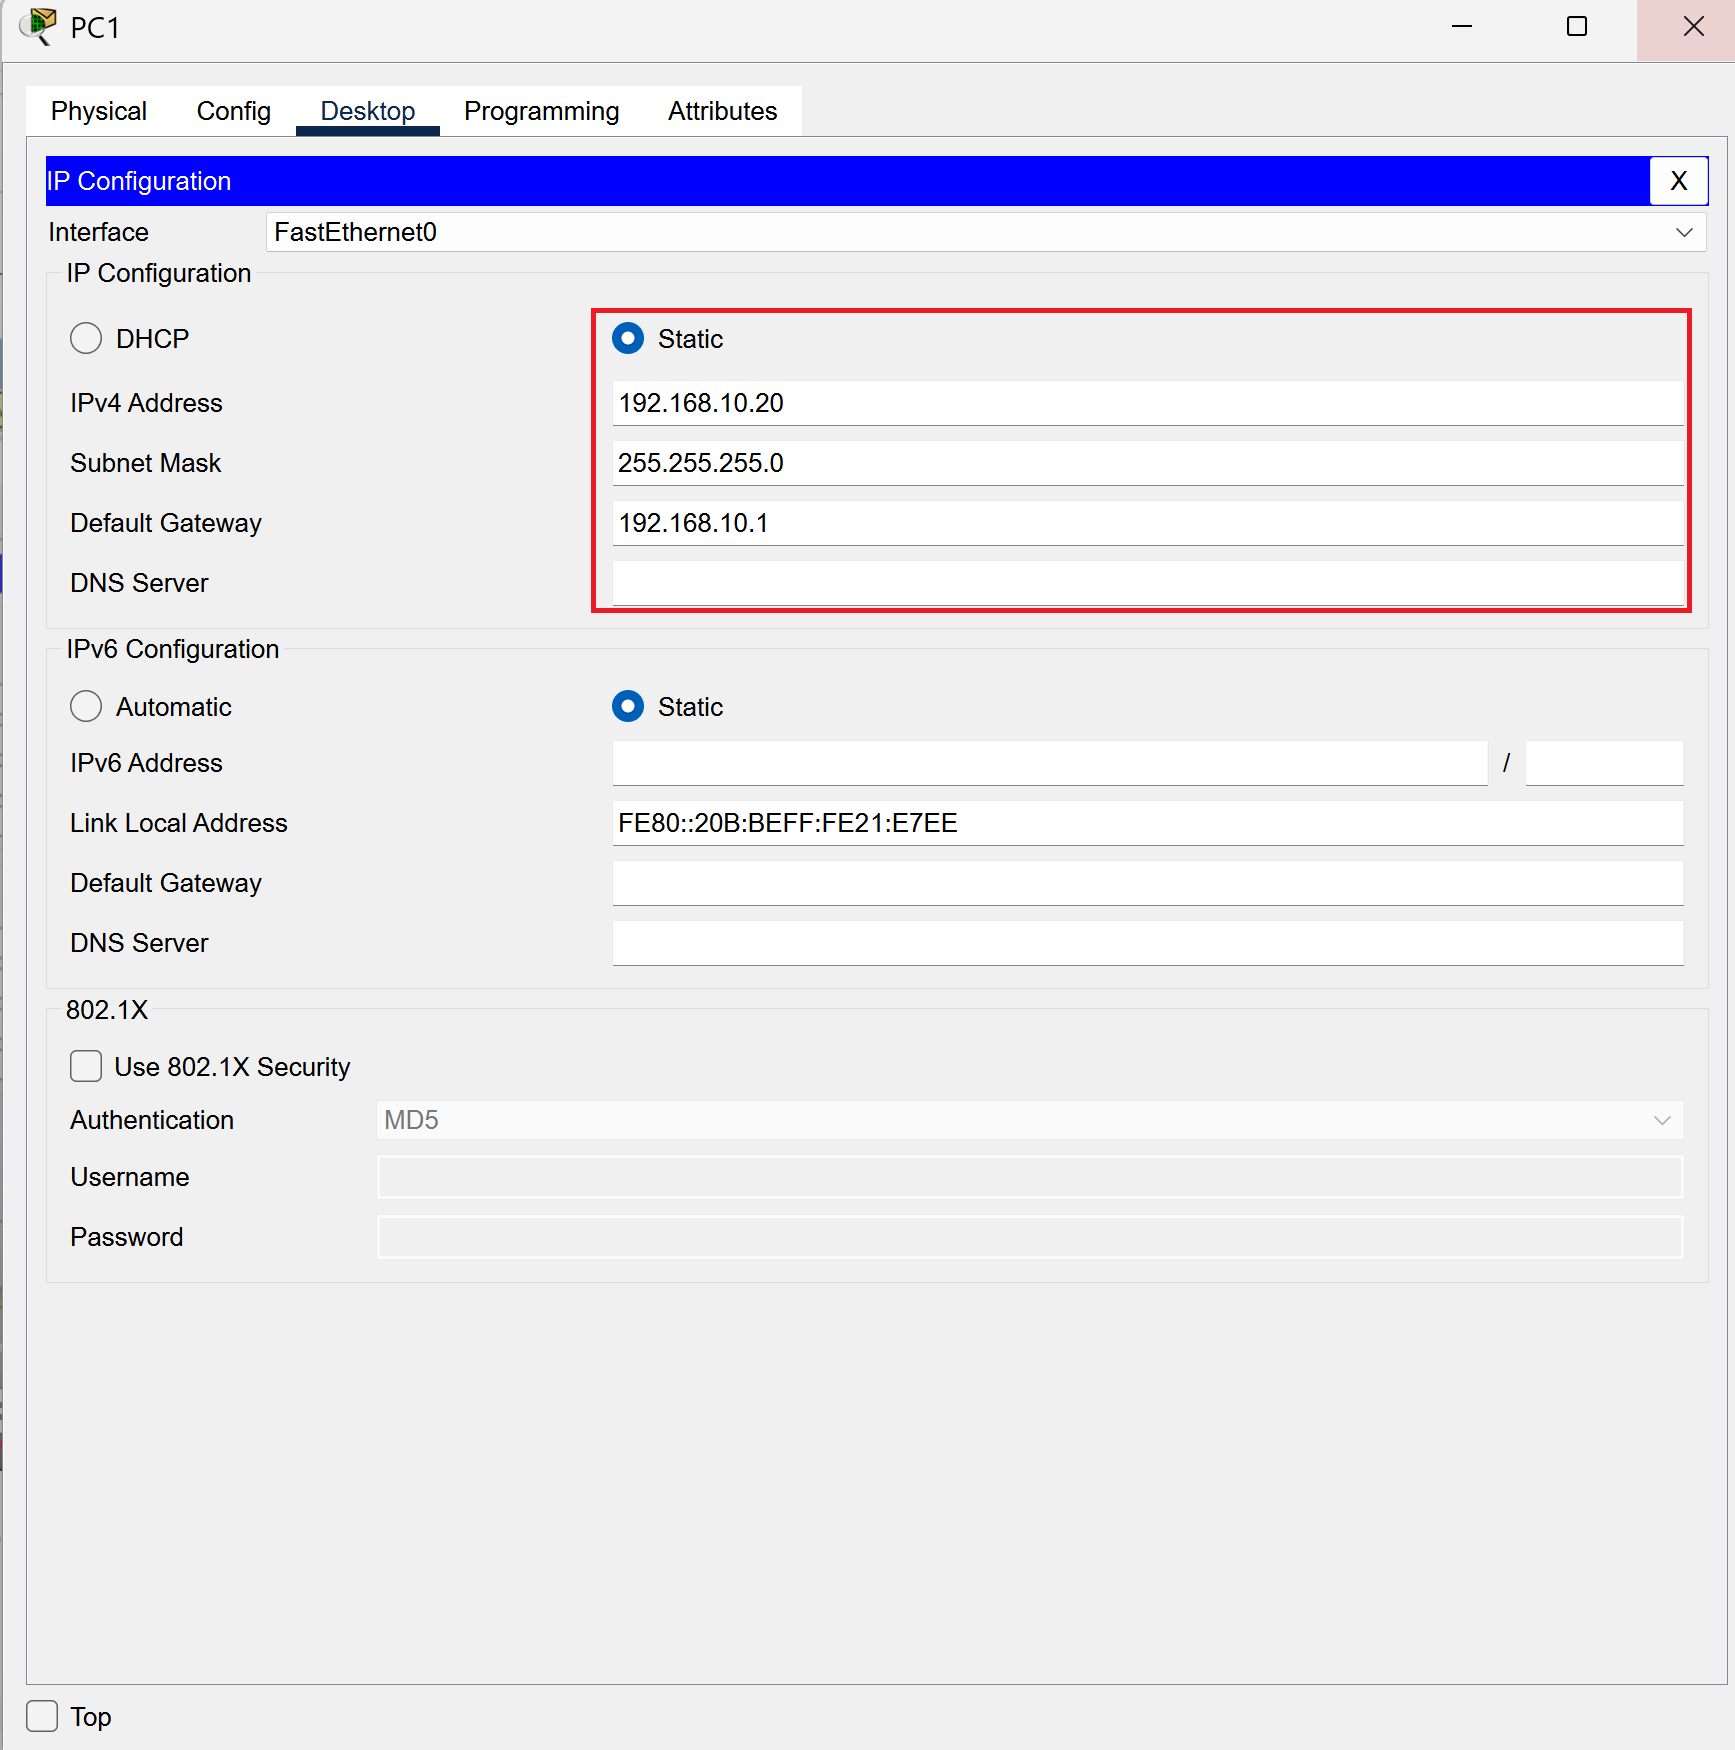
Next, head to PC1 and repeat the same steps and input the information provided.
Ipv4: 192.168.10.20 Subnet Mask: 255.255.255.0 Default Gateway: 192.168.10.1
It’s CLI Time
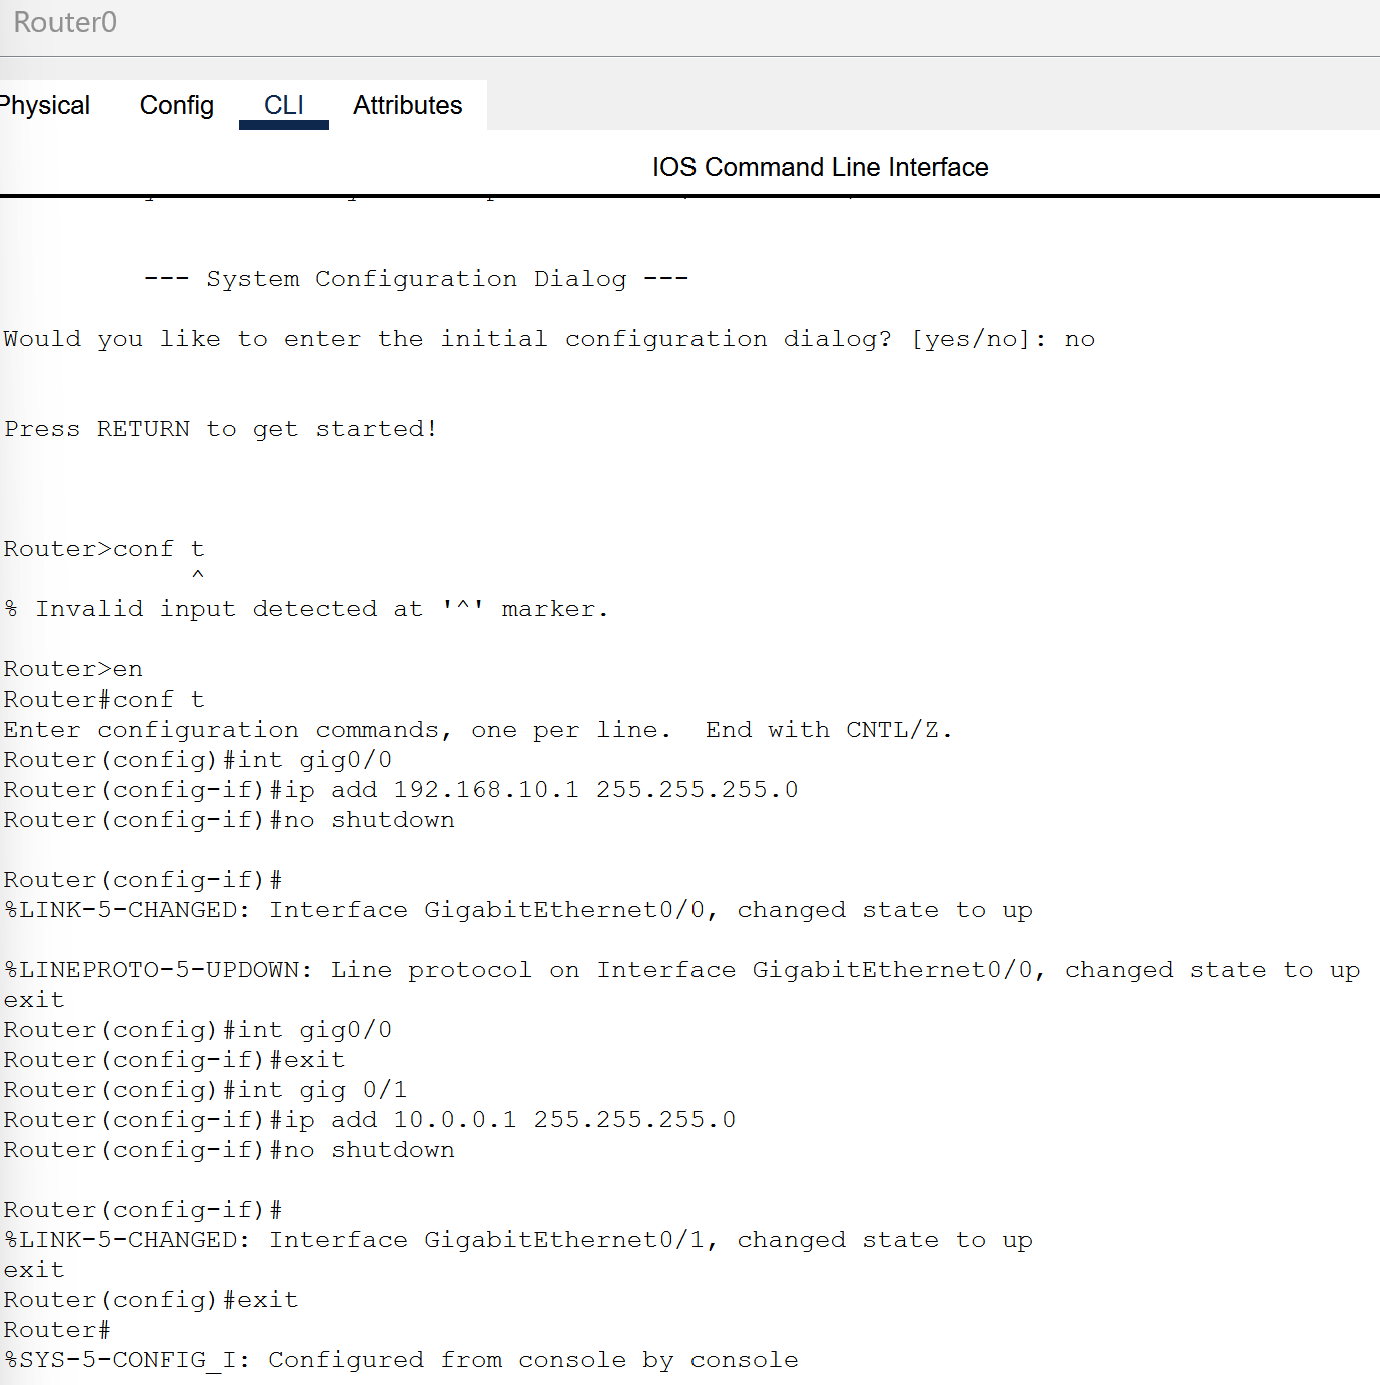
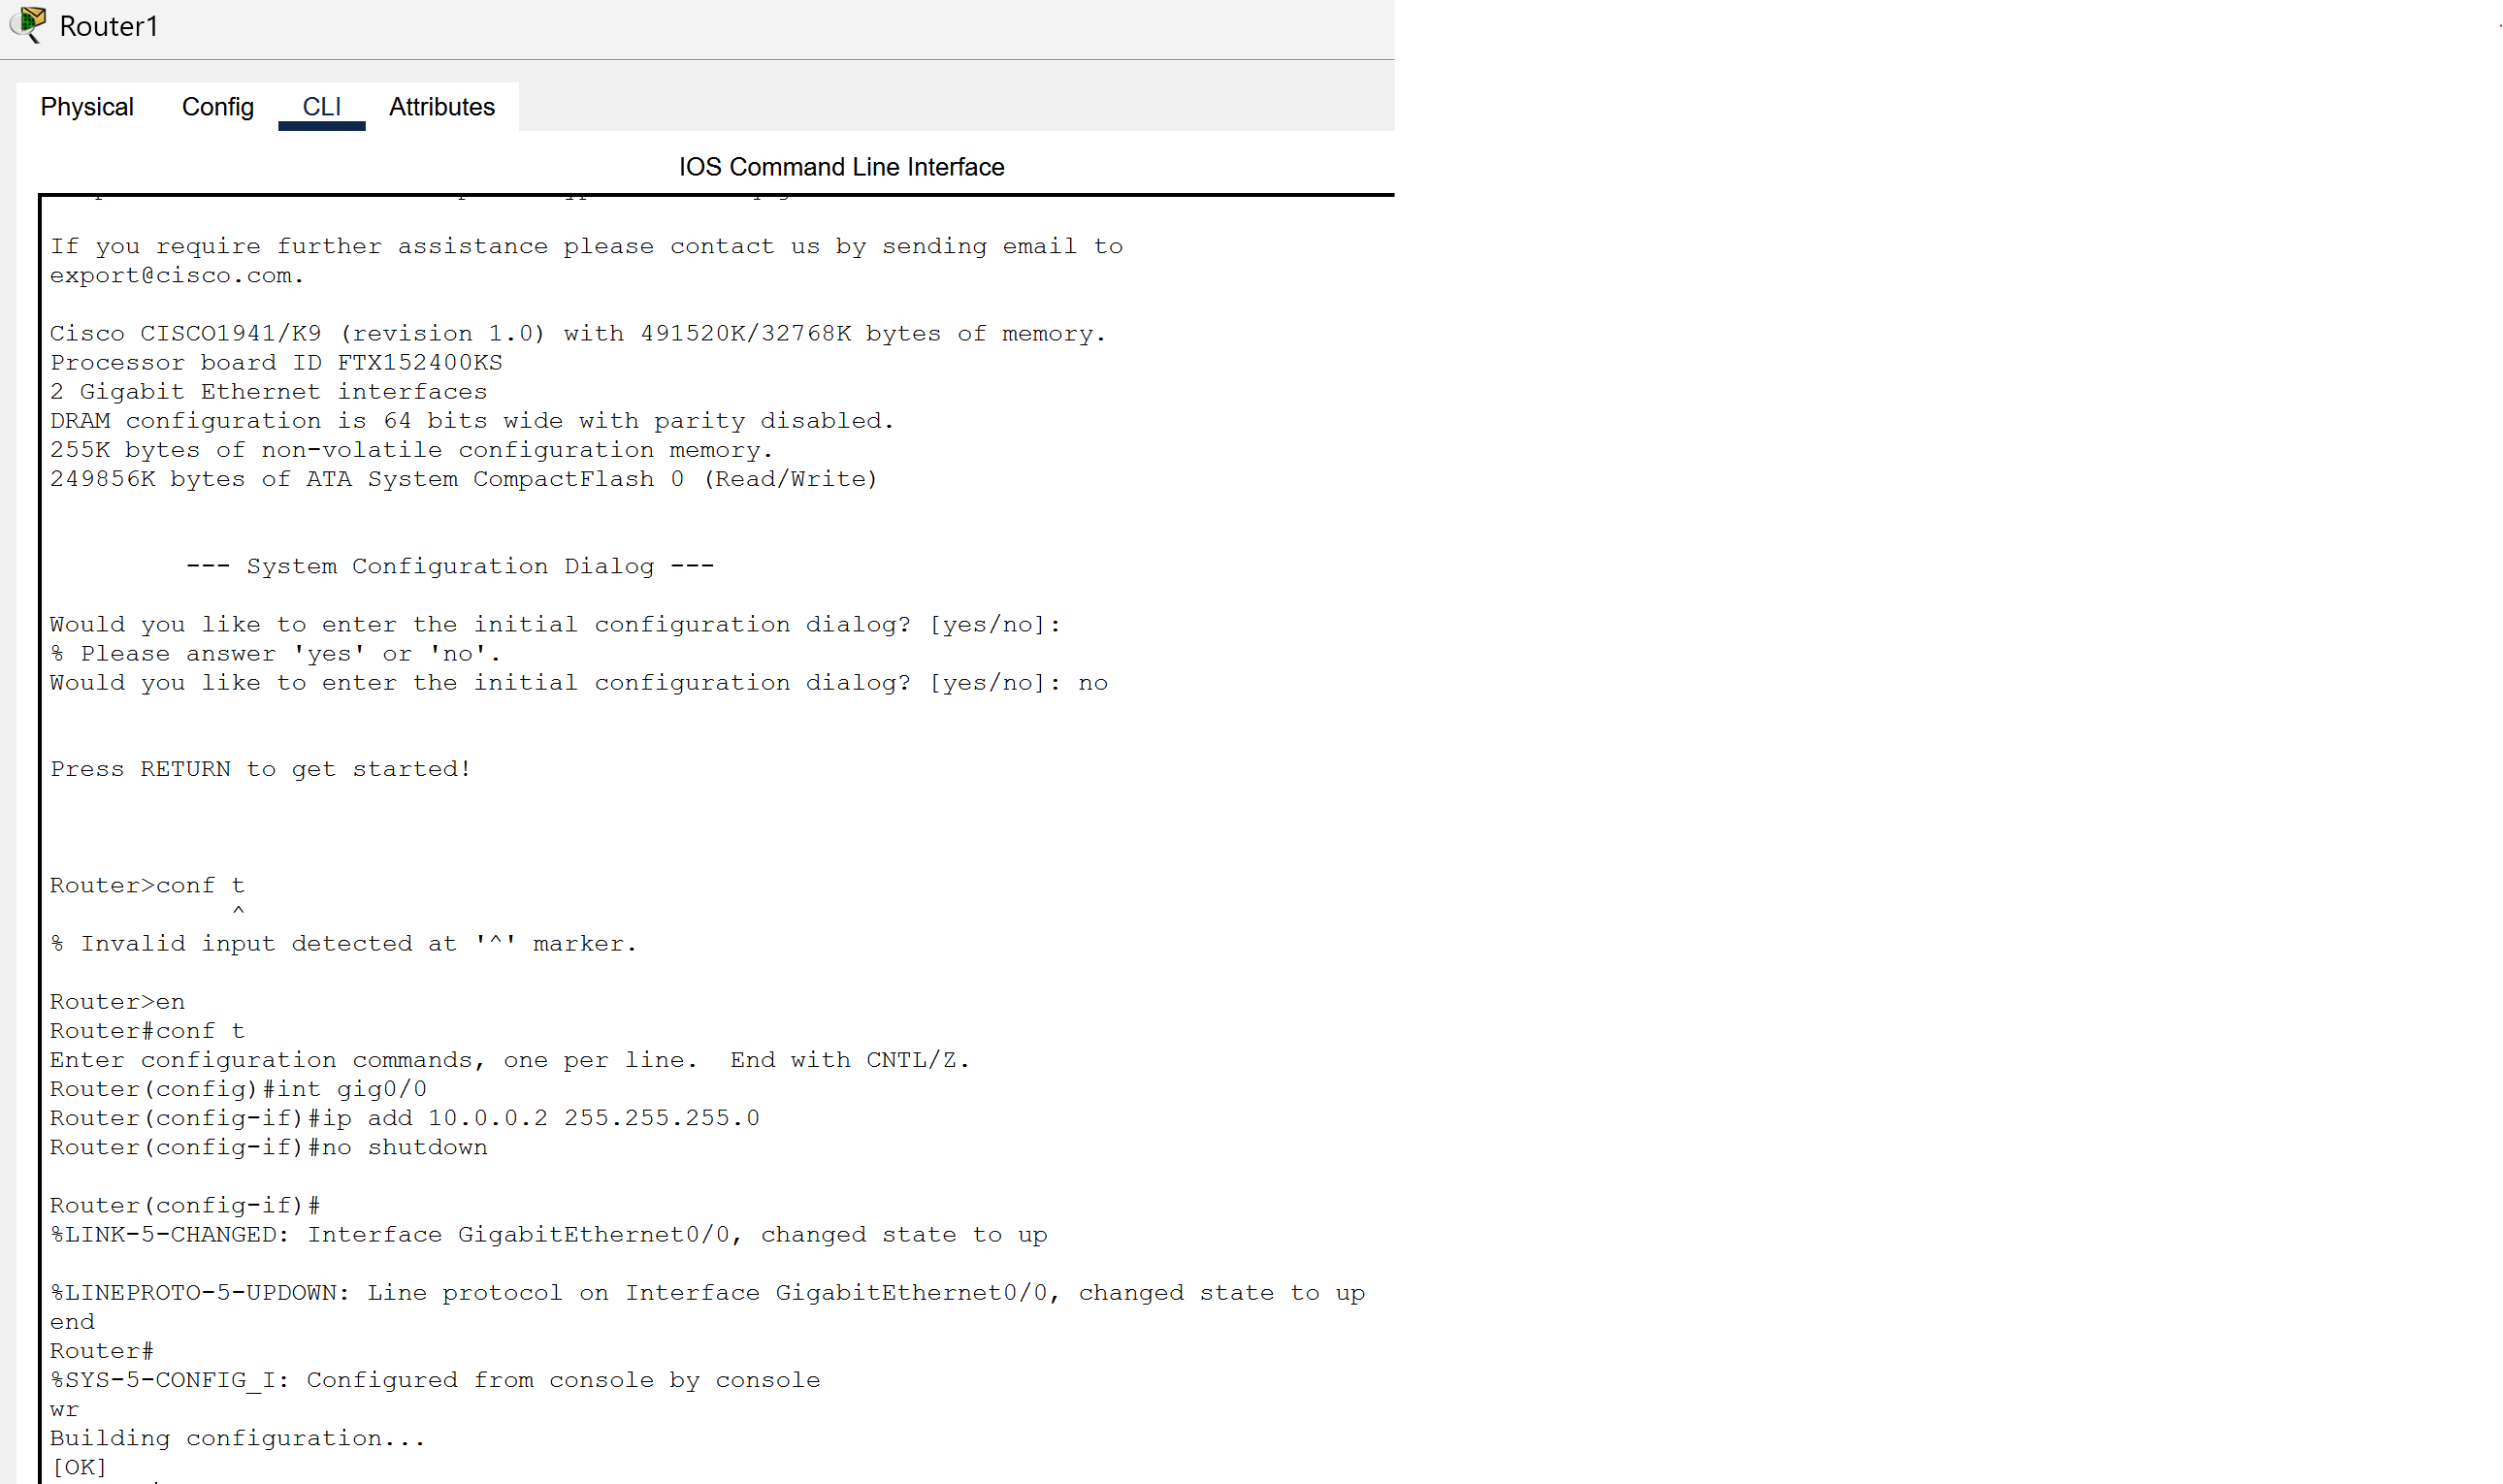
This next step may be a bit much but do your best to follow along! We’re going to be assigning IP’s to routers, devices, and configuring NAT overload aka PAT with the CLI terminal.
Input this information into your CLI box to add an IP address.
Now, we’re going to be configuring NAT overload (PAT). Input what I have put in. This will configure PAT.
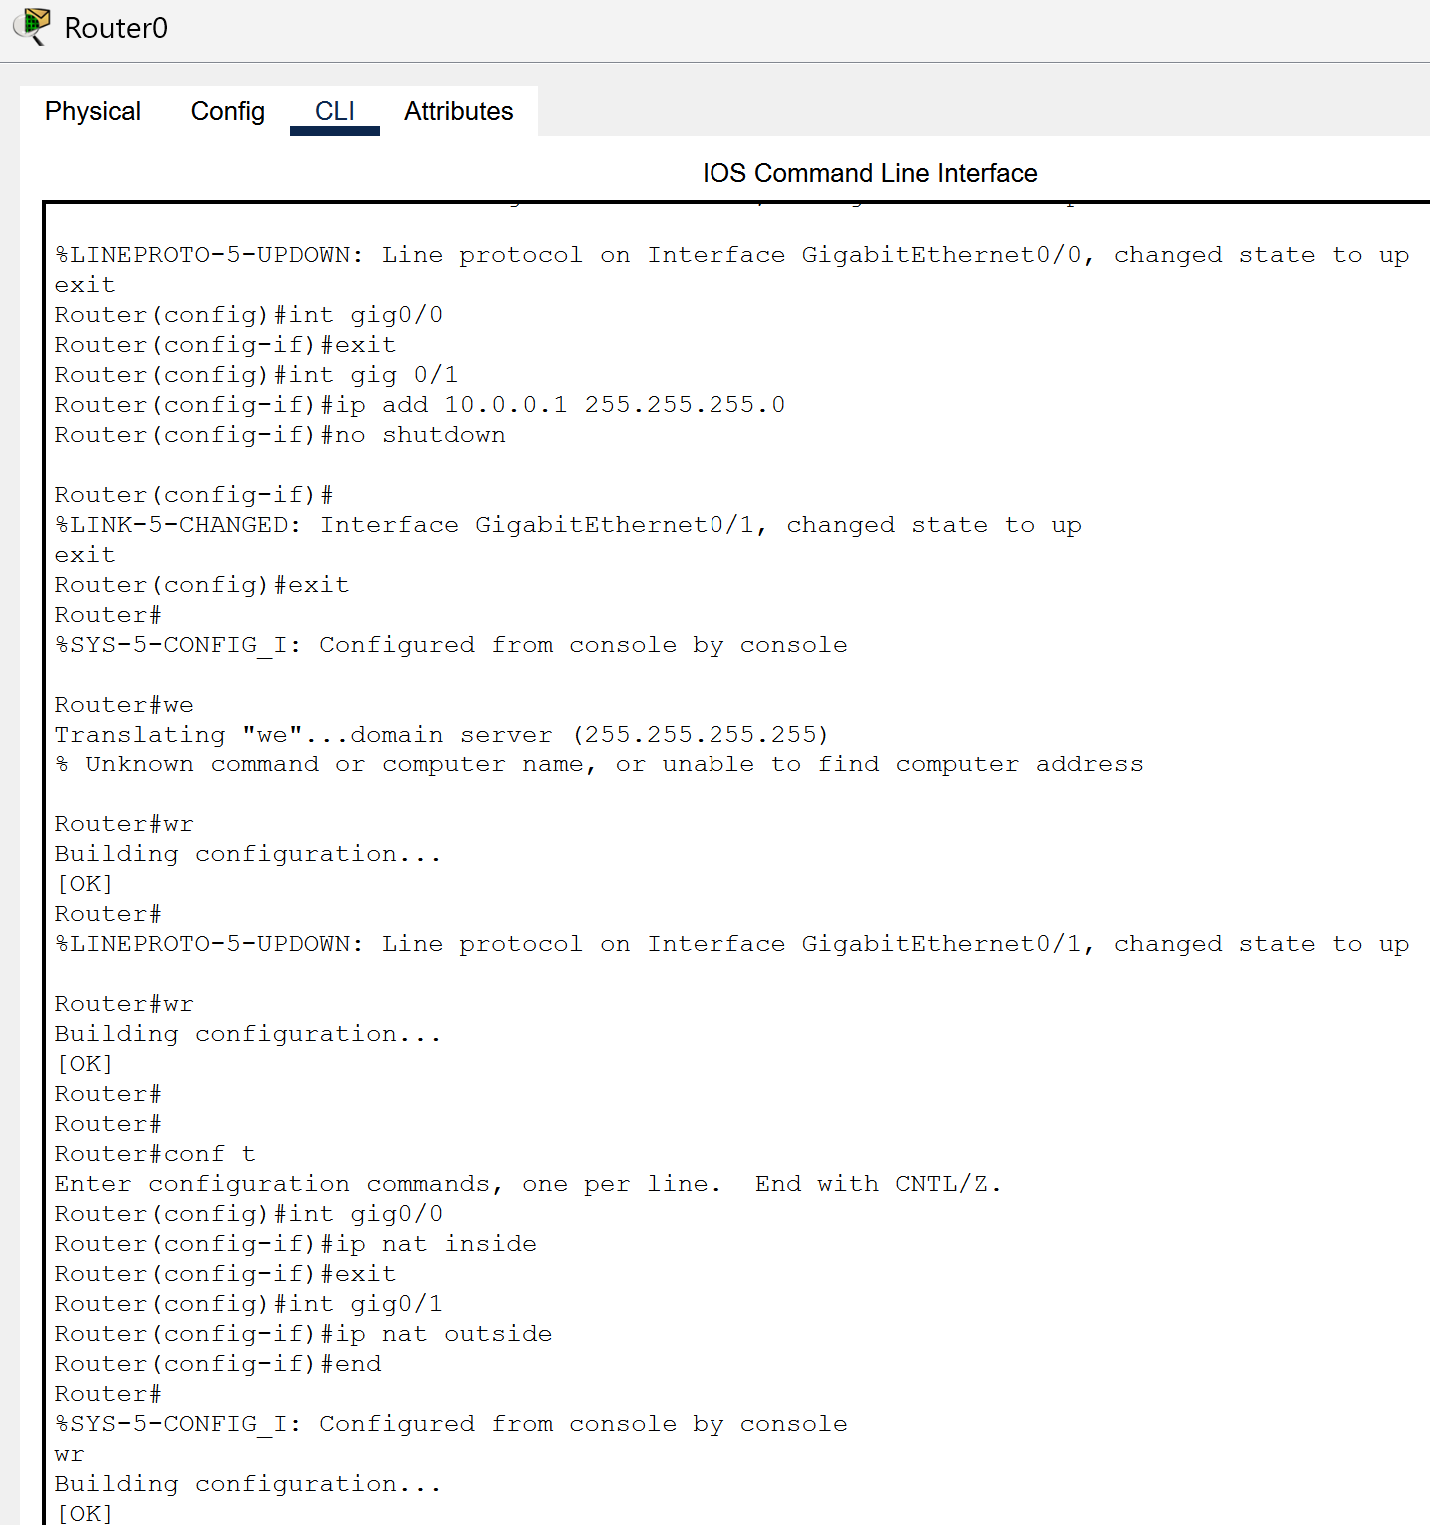
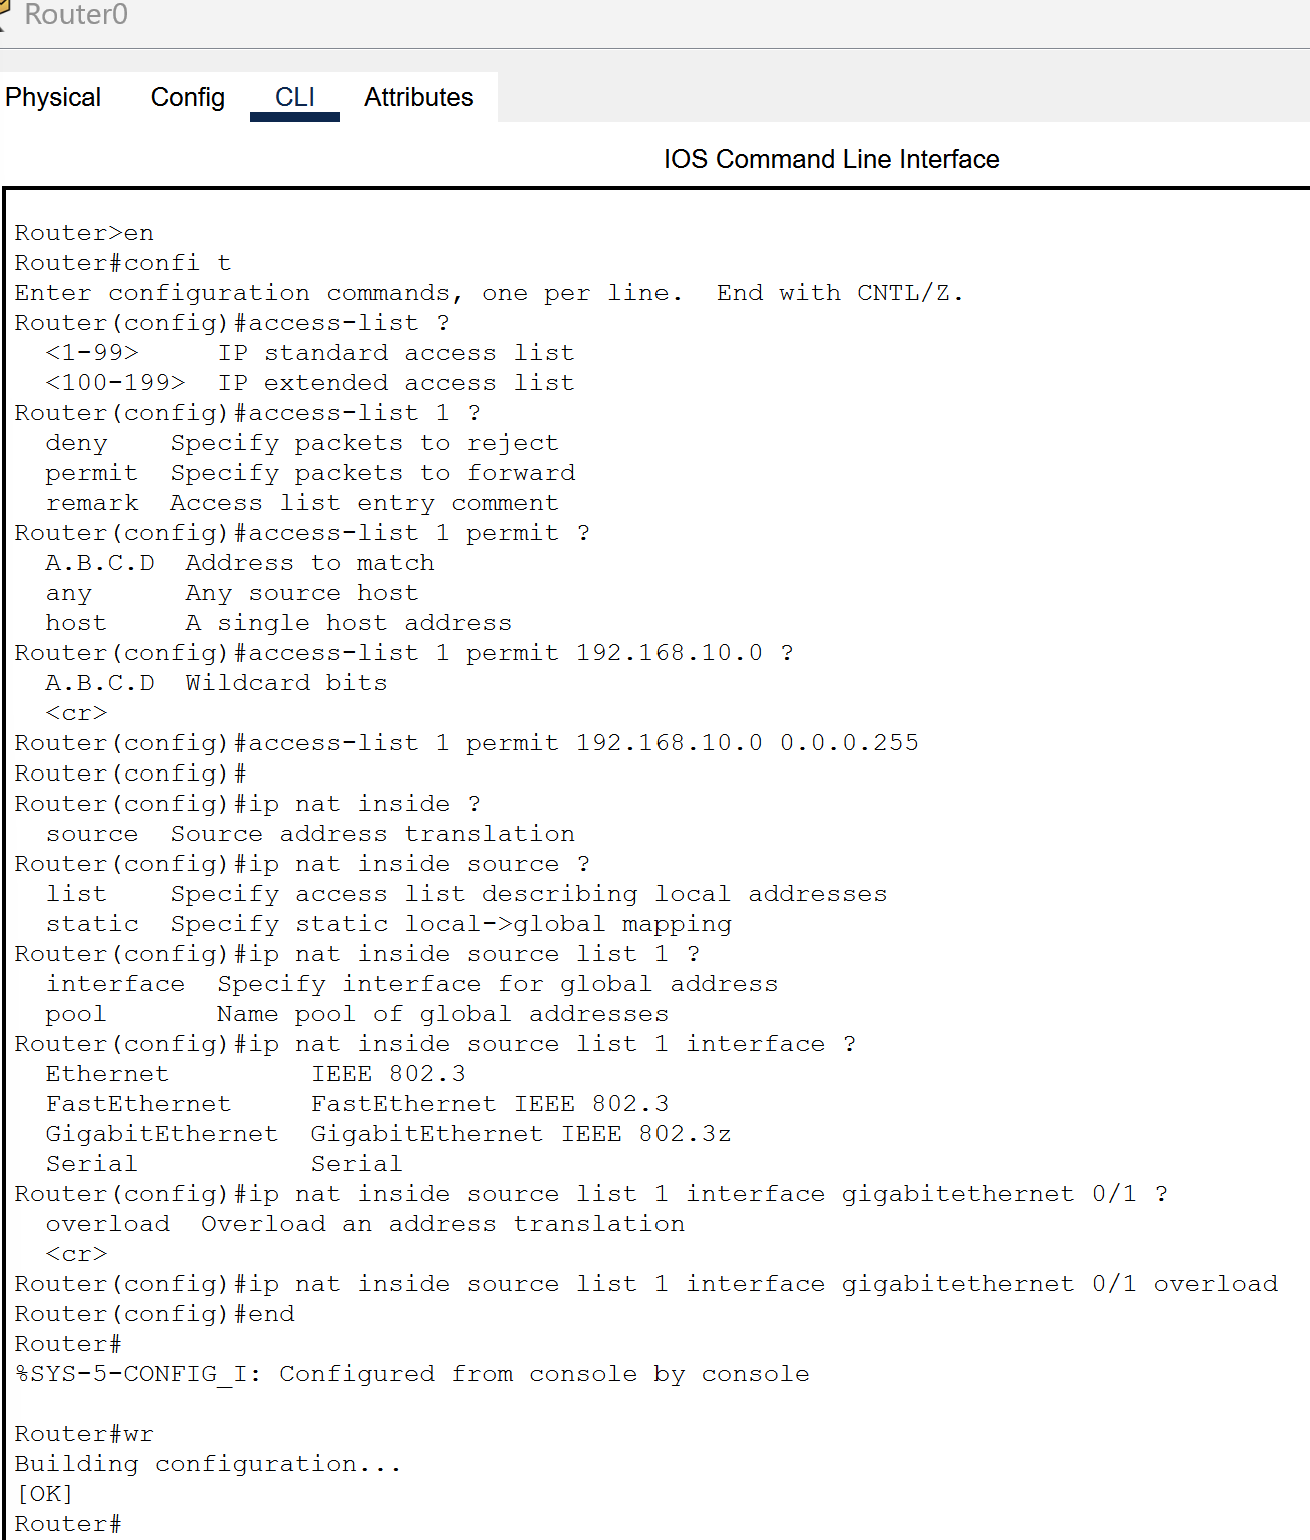
With that last step, PAT should be configured on your network. If you desire to further test the connectivity, you can open up command prompt on either of your PC’s and ping an ip address. This should reflect on whether it is working or not and provide said results.
It Is Finished!
You have successfully configured PAT in your network and now you can replicate this on your own networks! It got a bit complicated in the CLI portion but you managed to follow along. Congratulations and awesome job! What’s next on the agenda? Stay tuned for more network tutorials in the future!