What’s HTTPS and HTTP?
What is HTTPS and HTTP you say? You’ve come to the right place! HTTP is a protocol that allows browsers and servers to communicate over the internet. It transfers data all over the internet so you can browse web pages! The downside is that HTTP is not encrypted meaning that your information can be intercepted and read! HTTPS is the same as HTTP but it’s a step up because it’s encrypted. This adds what is basically a shield over your information so that other parties can’t snoop around and steal your information.
What’s the Plan?
We’re going to be using Cisco Packet Tracer to set up a network which has a HTTP and HTTPS server in it and then connect to an IP using both HTTP and HTTPS to test that it actually works. Get ready to follow along or you might get lost along the way!

Let’s Get Started!
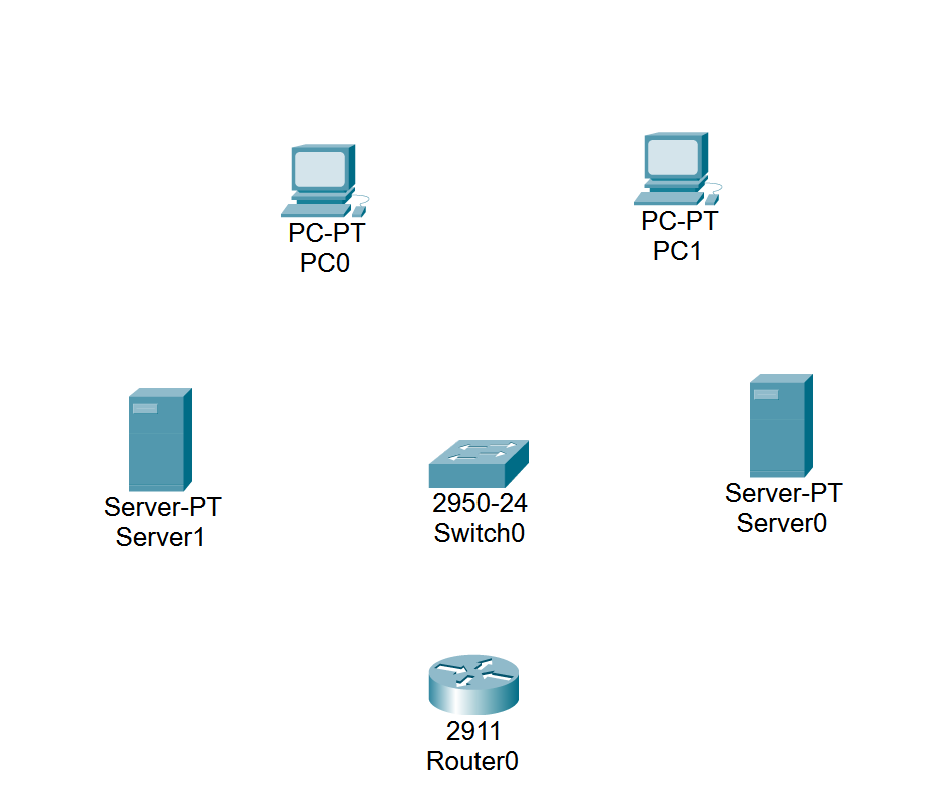
So we’re going to get Cisco Packet Tracer fired up and then we’re going to set up the framework for our network. Start off by placing 2 PC’s, 1 switch, 2 servers, and a router. This is what our network is going to look like.
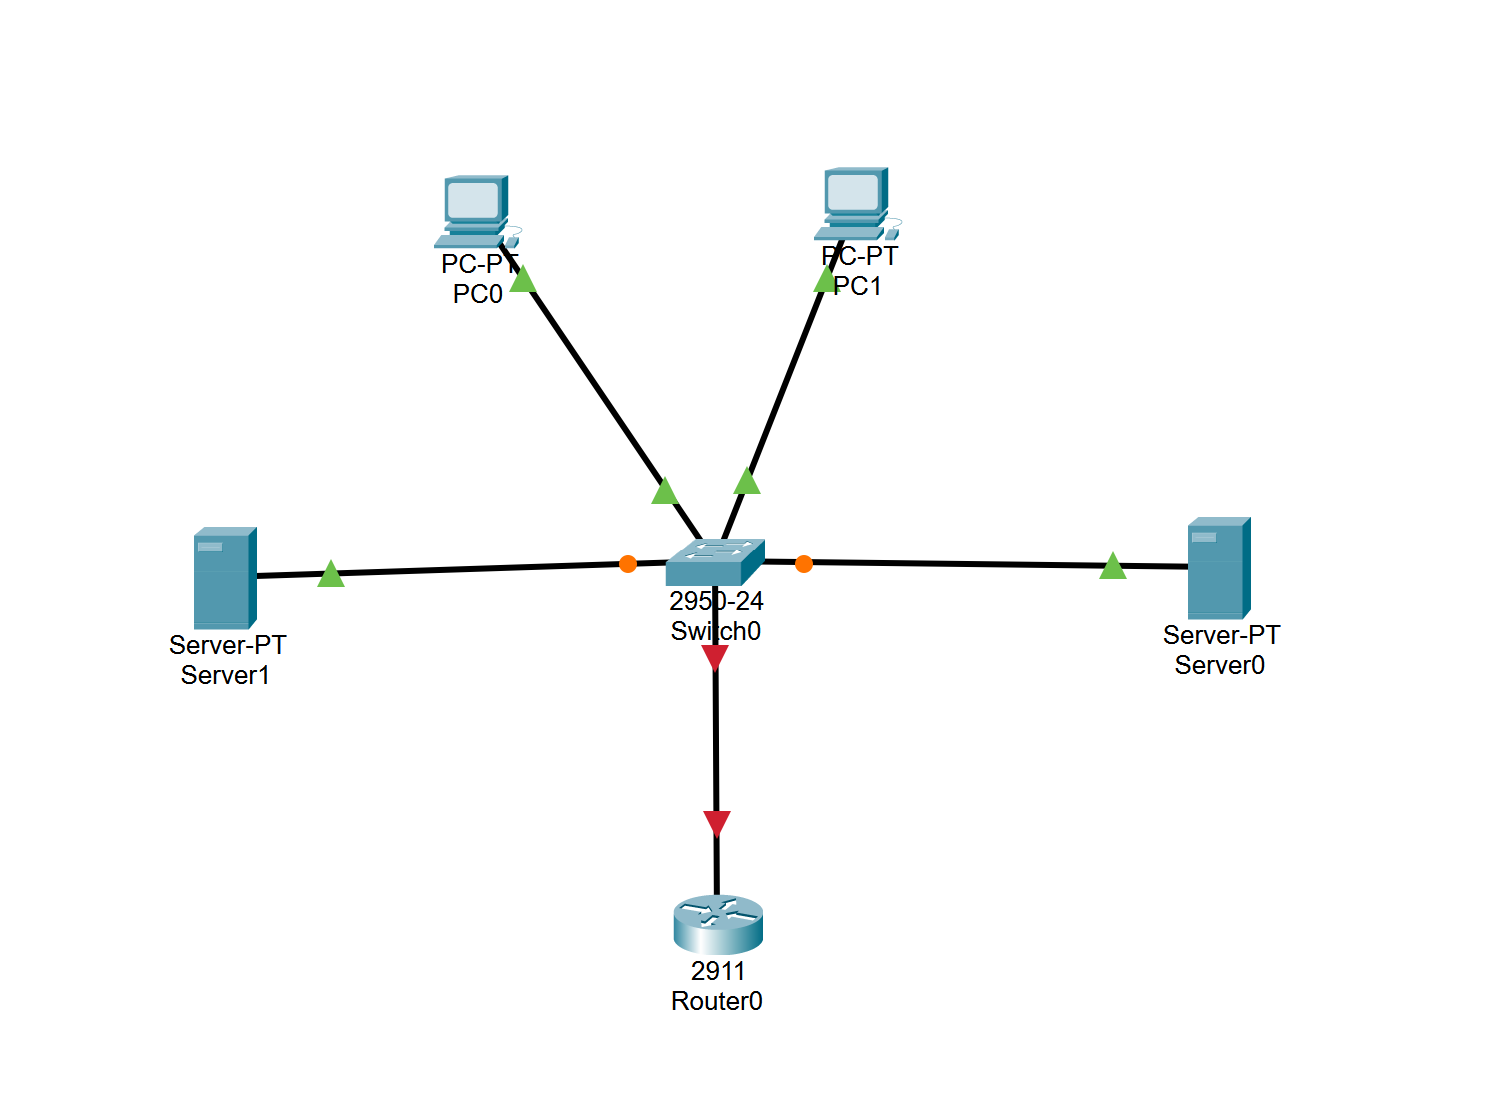
Next we’re going to connect our devices. Head to the connections tab and select automatically choose connection type.

Now, connect both of your PC’s to the switch. Then connect each server to the switch. Finally, connect the router to the switch.
IP Assignment Time
It’s time to assign IP’s to our devices! This might get a bit tedious but please stick with me and we’ll get through it.
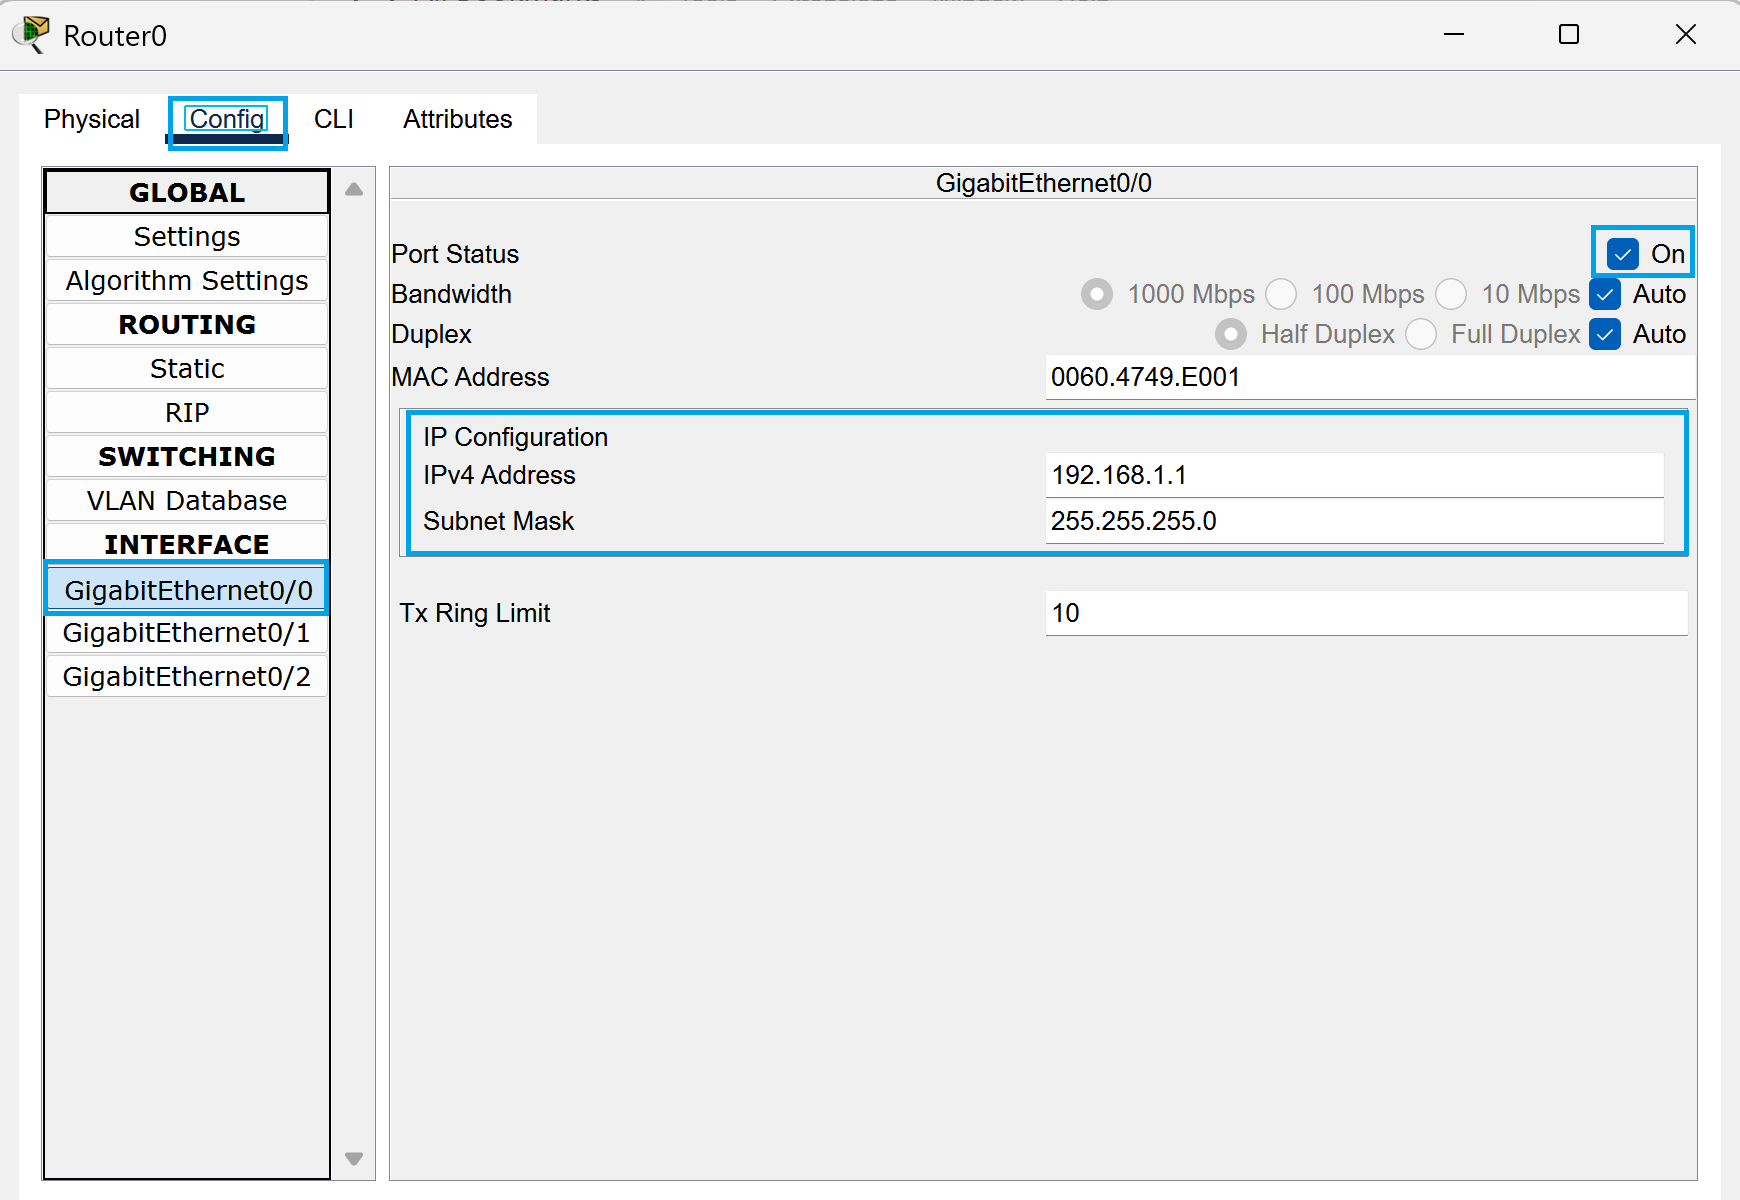
Head to your router and go to the desktop tab, hit IP config, and then to the gigabitethernet 0/0 tab on the left under interface.
Set your port status to on. Next, set the IPv4 address to 192.168.1.1 and then the subnet mask to 255.255.255.0.
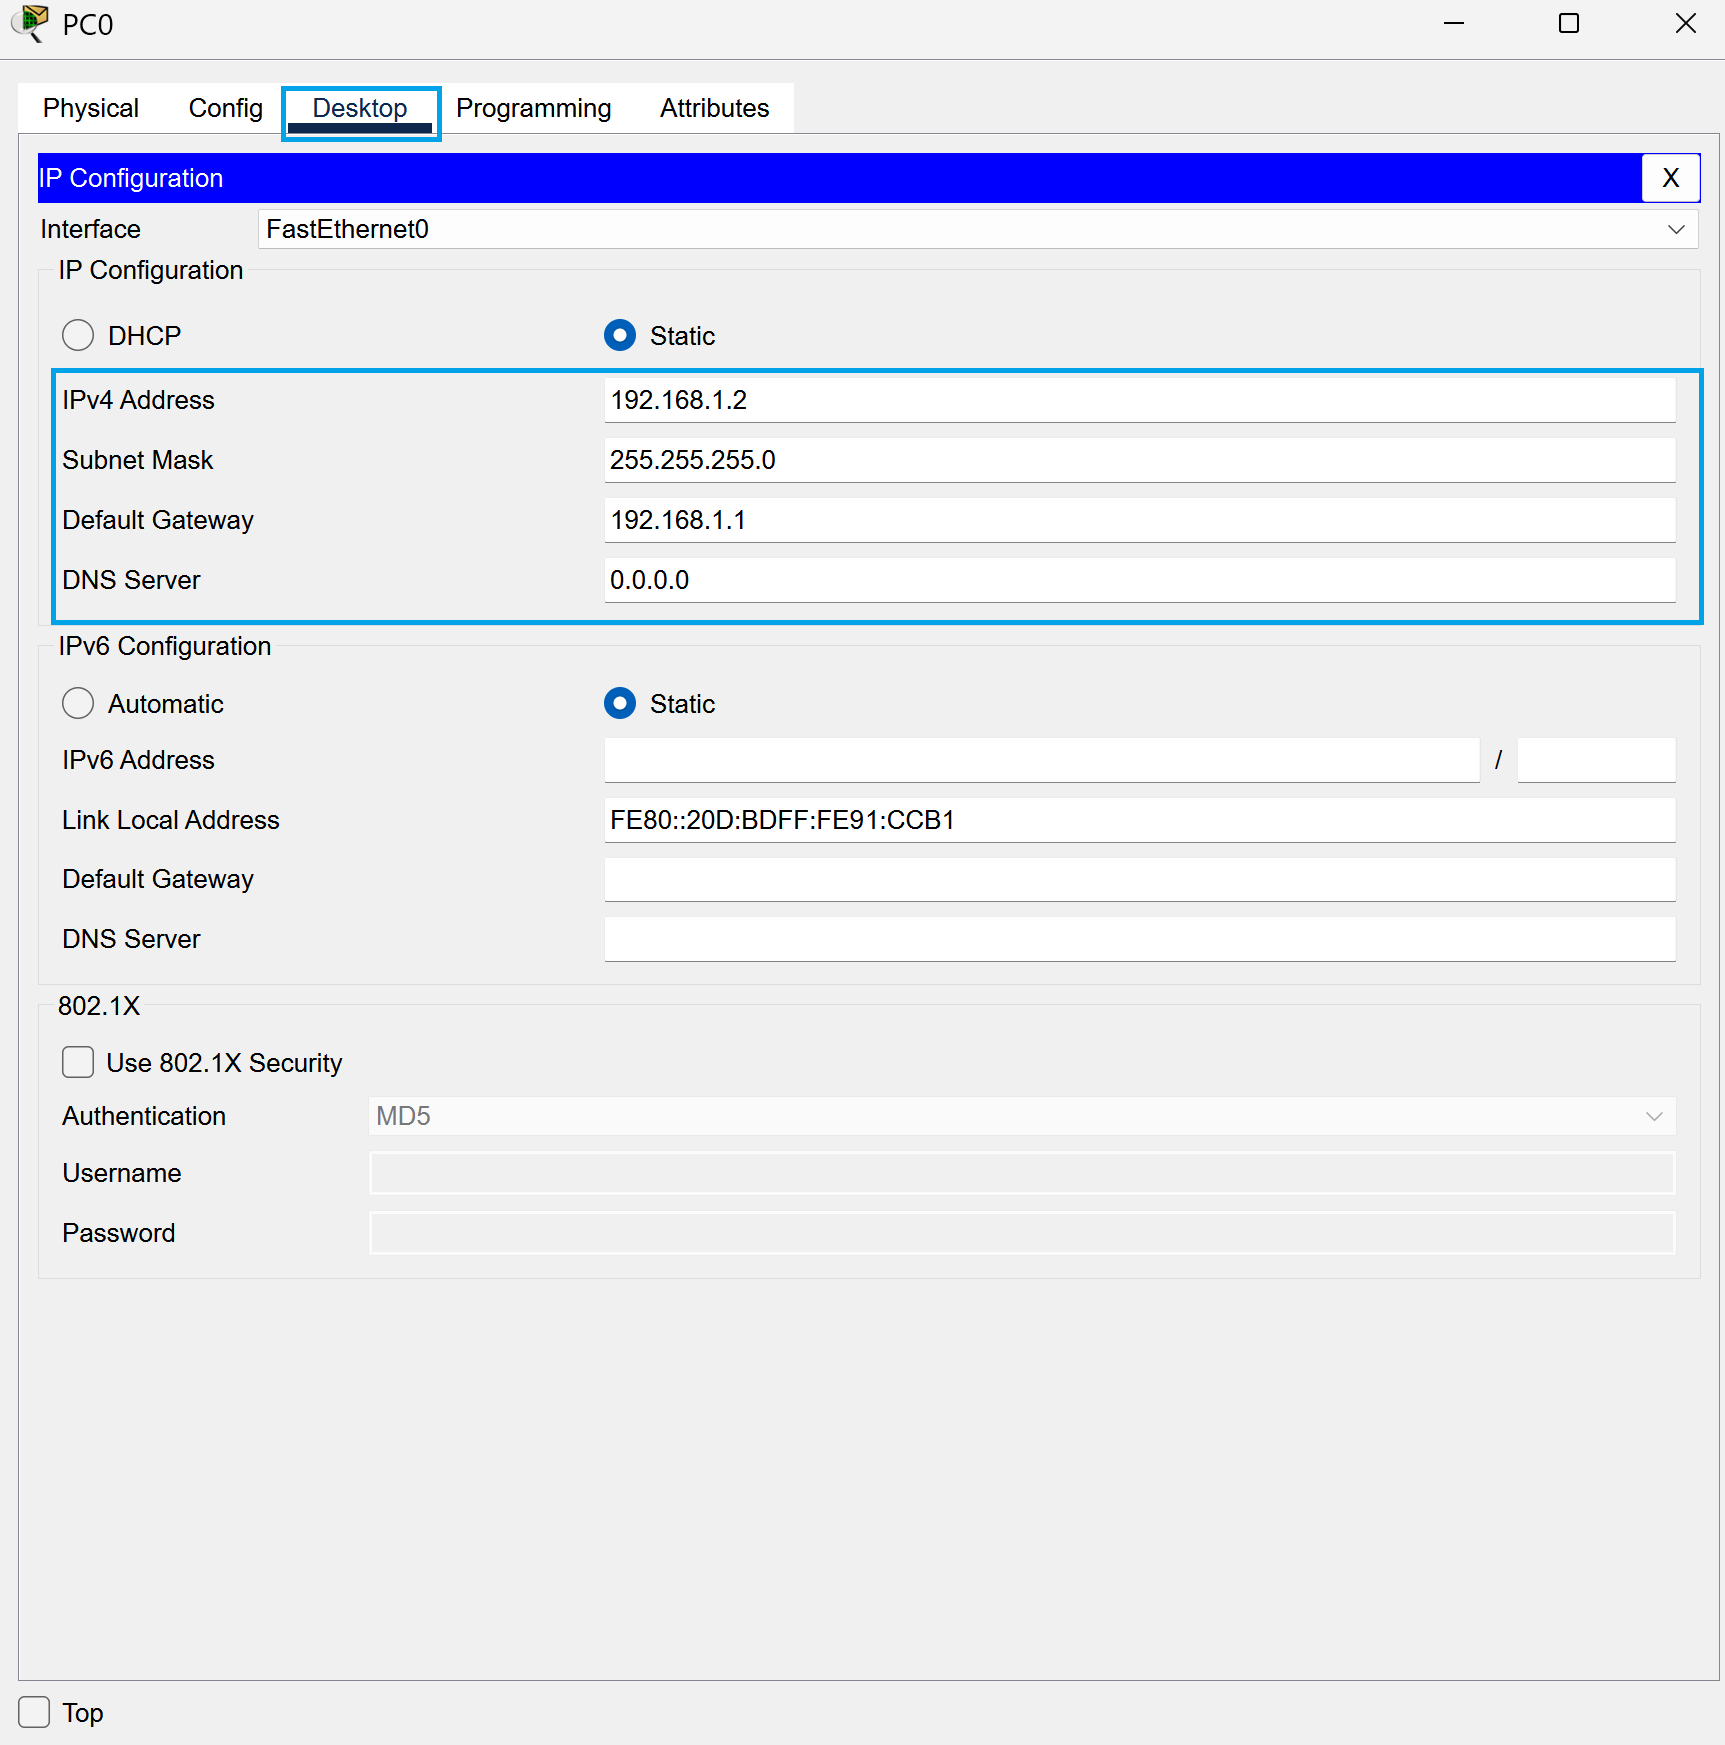
Now we’re going to head to our first PC and assign some IP’s. Go to your PC, hit desktop, and then IP configuration.
Set IPv4 to 192.168.1.2. Next, set the subnetmask to 255.255.255.0. After that, set the default gateway to 192.168.1.1.
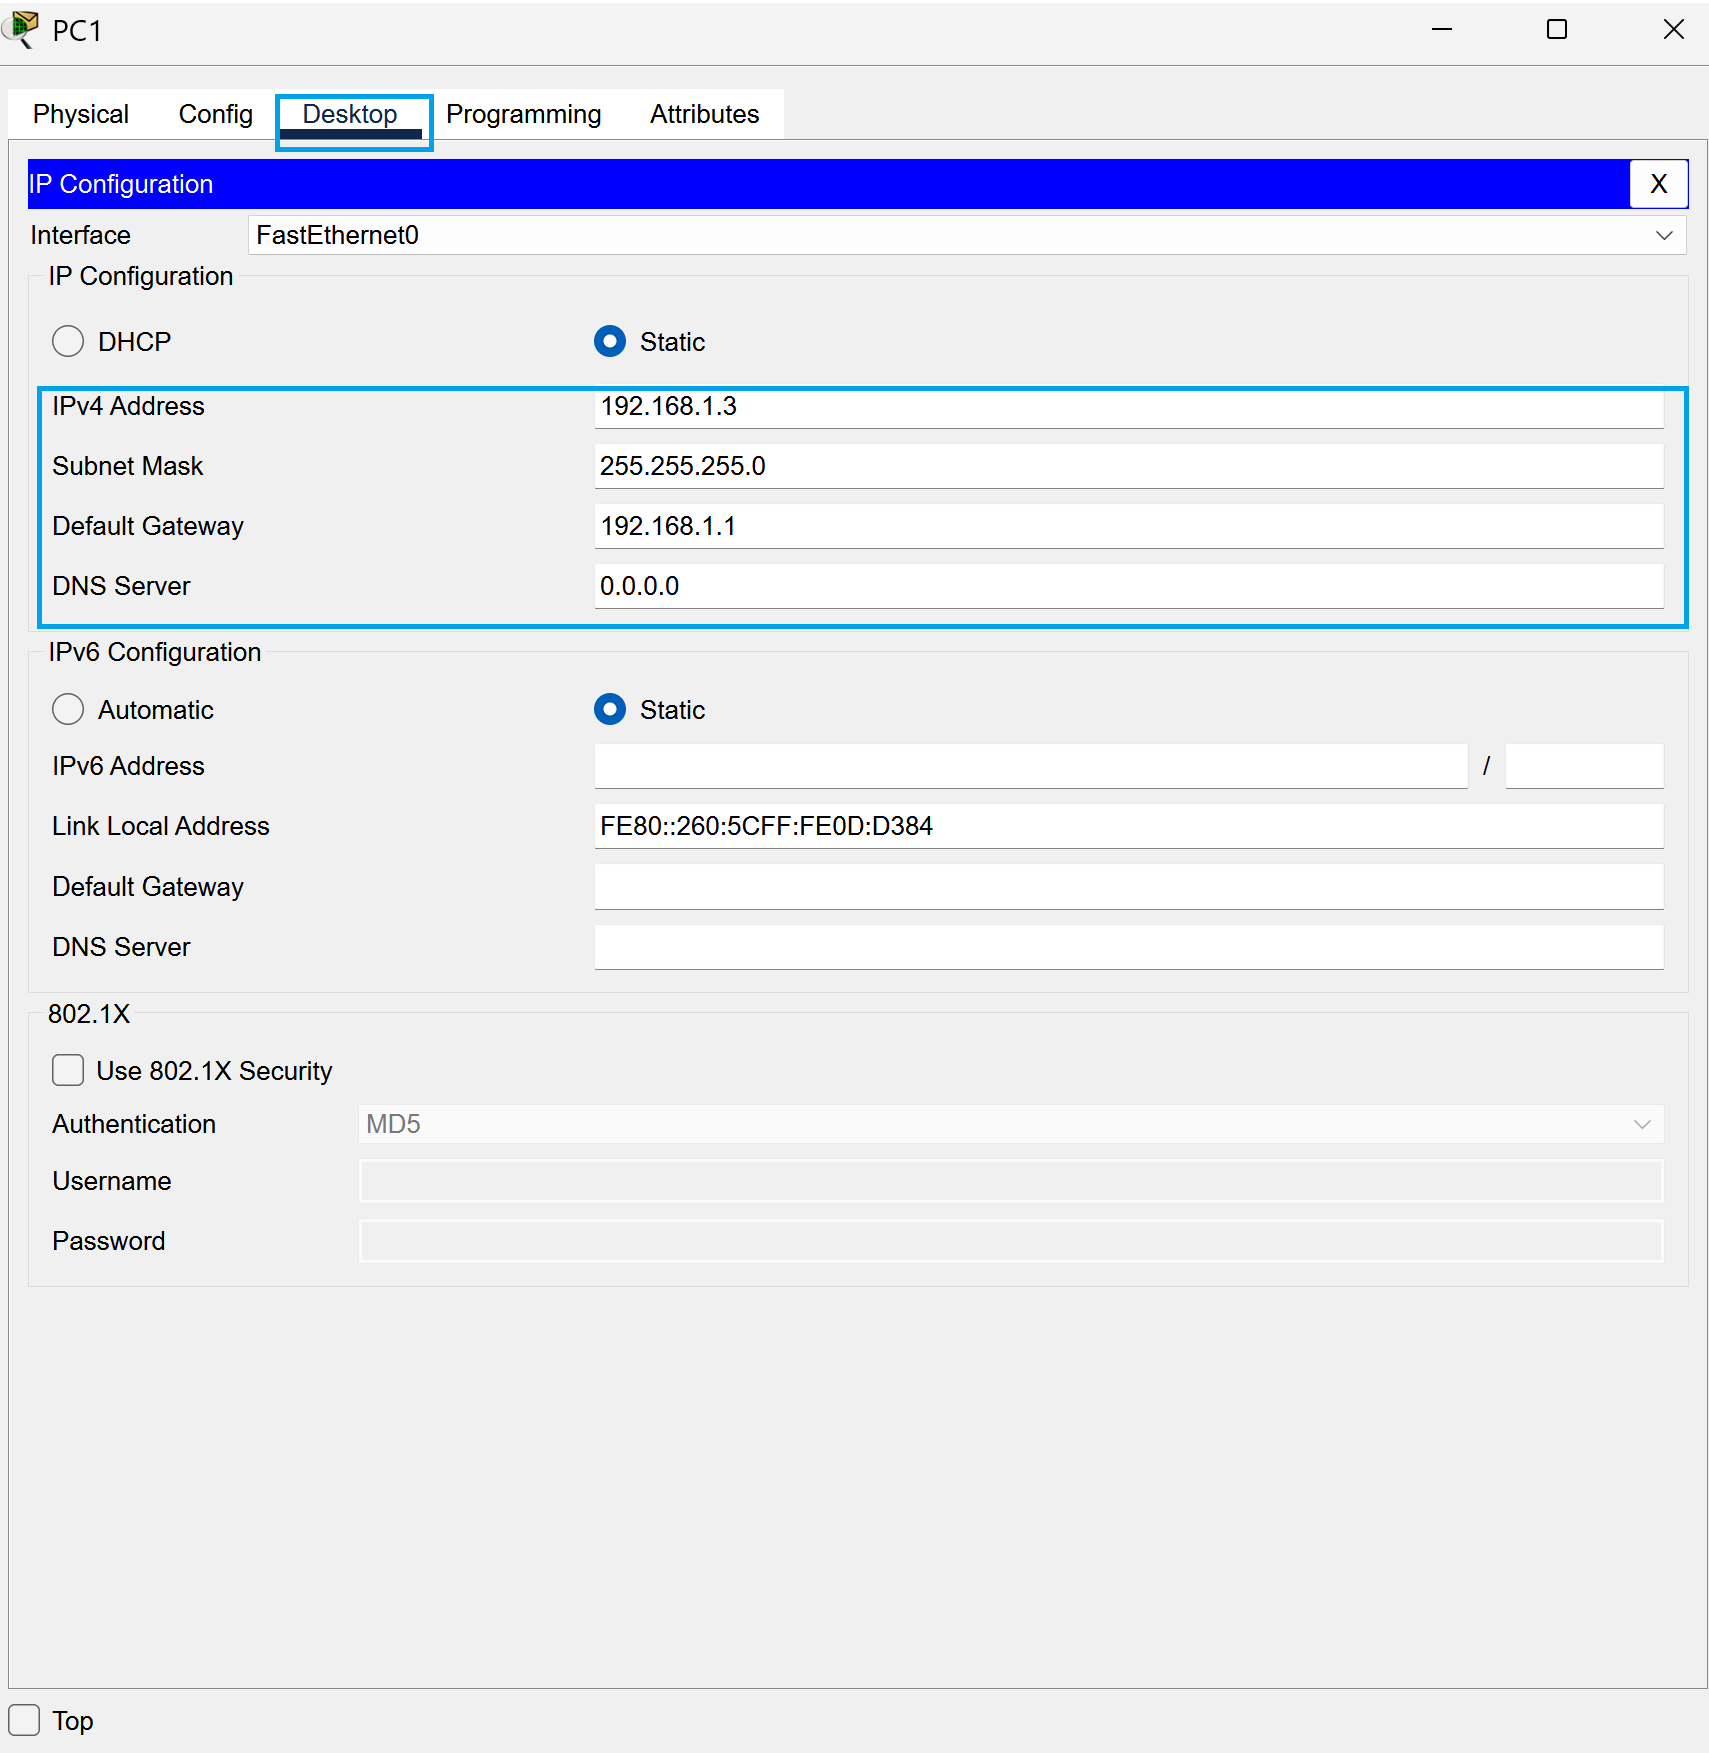
Go to the next PC and we’re going to repeat the same steps. Select the PC, hit desktop, IP configuration.
Set IPv4 to 192.168.1.3. Next, set the subnetmask to 255.255.255.0. After that, set the default gateway to 192.168.1.1.
Now head to the first server and go to IP configuration.
Set IPv4 to 192.168.1.5. Next, set the subnetmask to 255.255.255.0. After that, set the default gateway to 192.168.1.1.

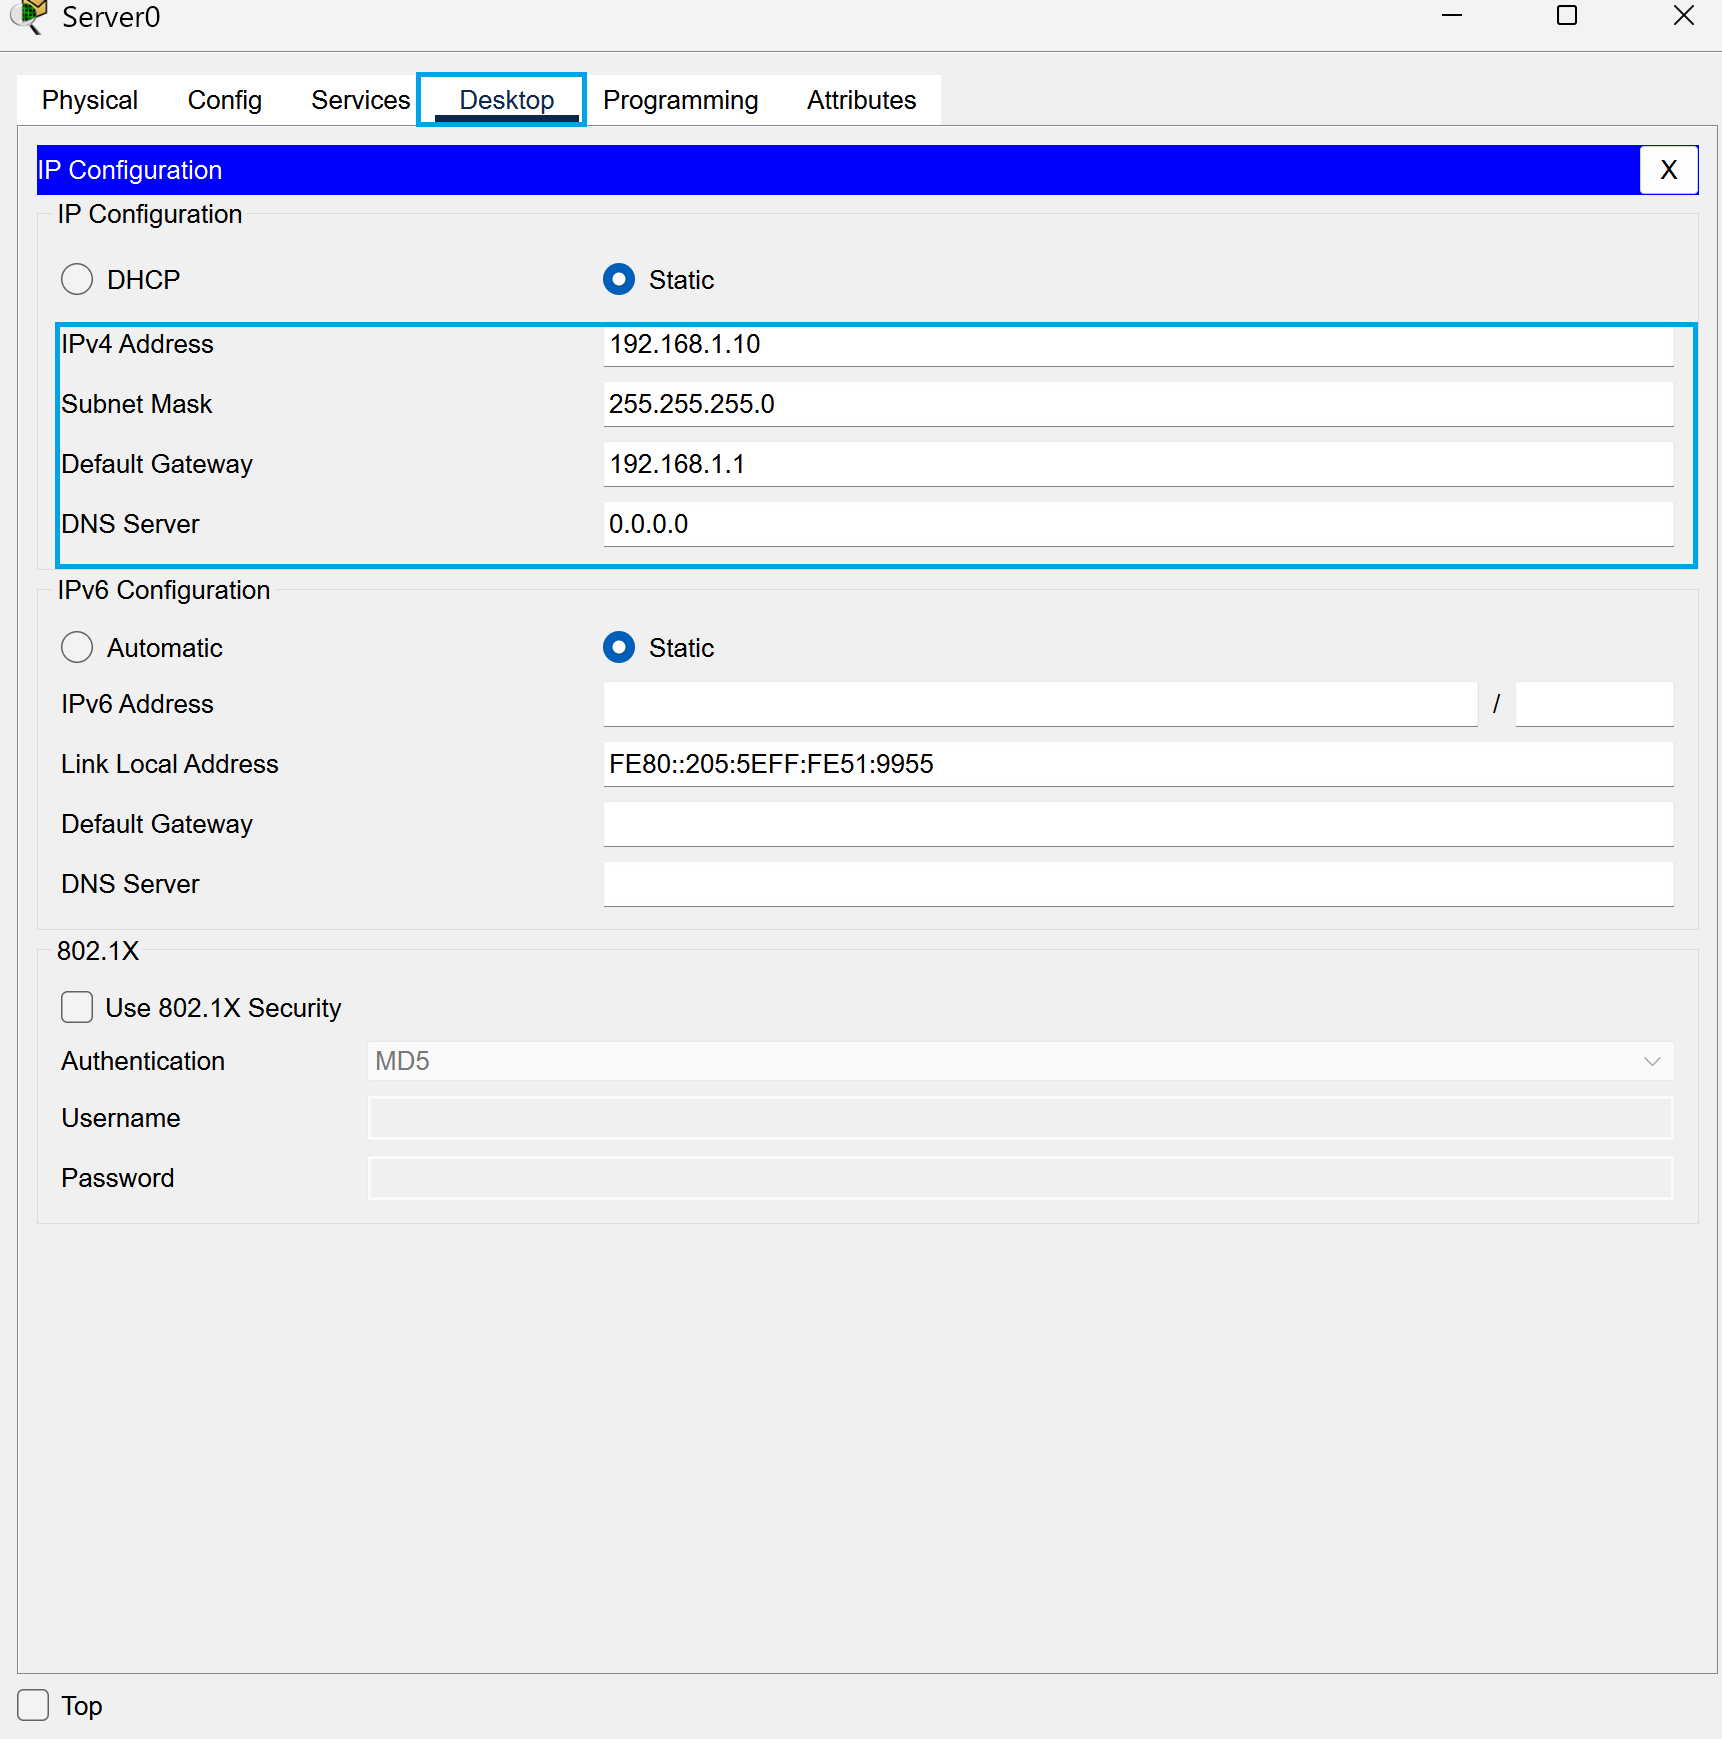
Now head to the second server and repeat these same steps.
Set IPv4 to 192.168.1.10. Next, set the subnetmask to 255.255.255.0. After that, set the default gateway to 192.168.1.1.
HTTP and HTTPS Time!
We’re going to configure our servers now and enable HTTP and HTTPS on them. Are you ready?
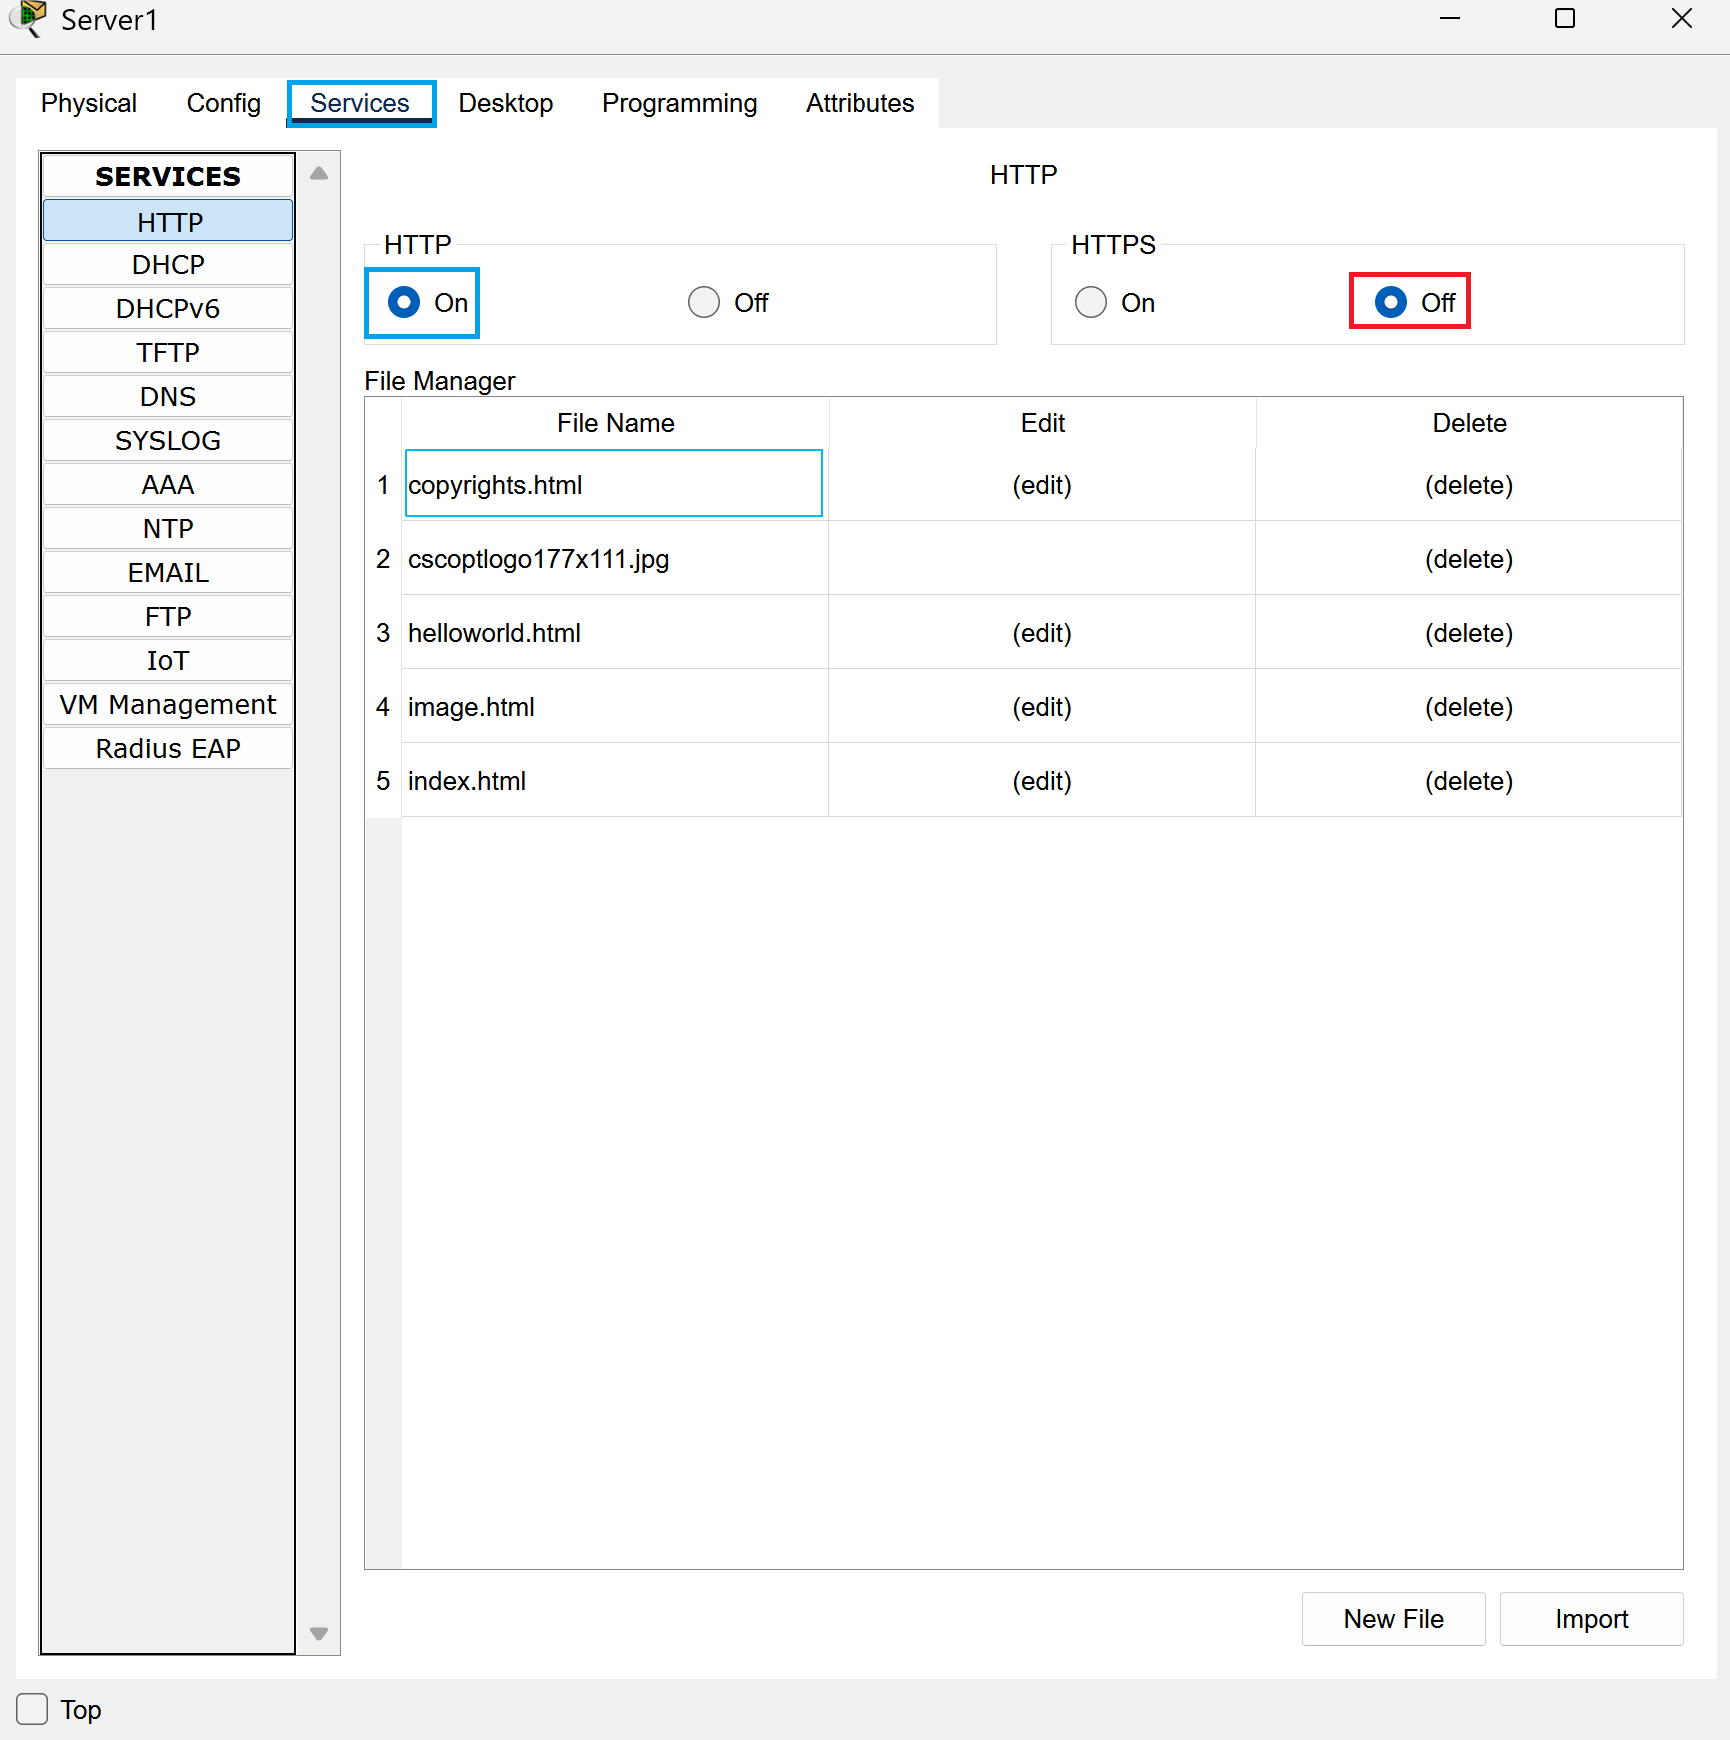
Head to the first server and select services. Turn HTTPS to off and make sure that HTTP is set to on.
Now, head to the second server and select services. Turn HTTPS to on and make sure that HTTP is set to off.
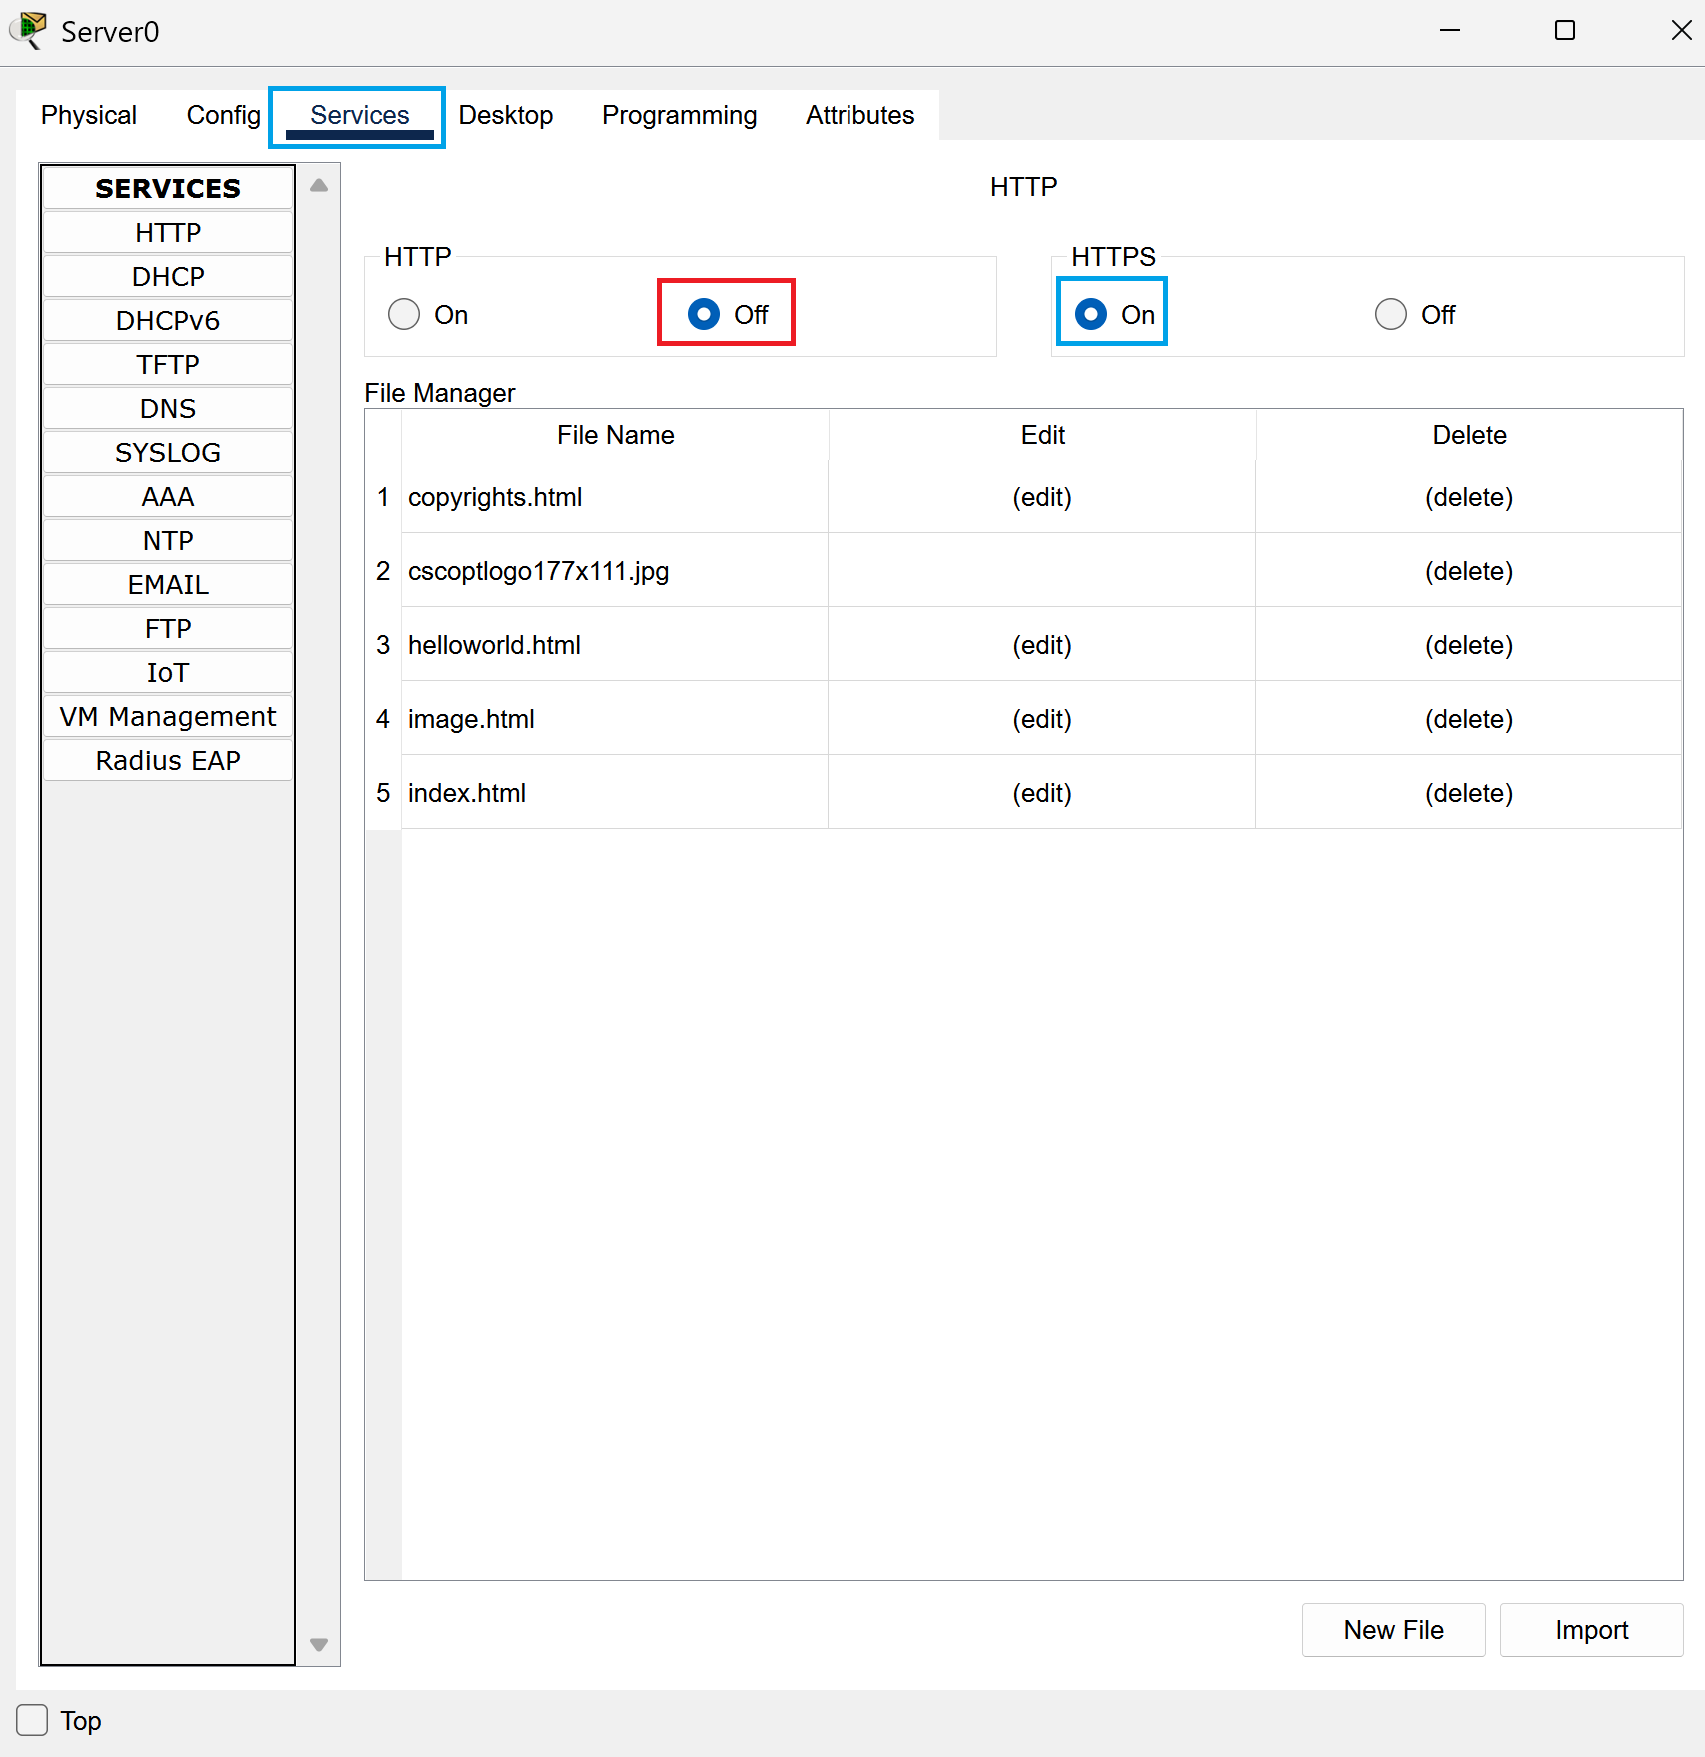
This will have our servers be the host of HTTPS and HTTP individually.
Time to Test
Now we’re going to see if our efforts paid off and test the connectivity! We’re going to be using both of our PC’s to see if we can connect to an IP through the browser.
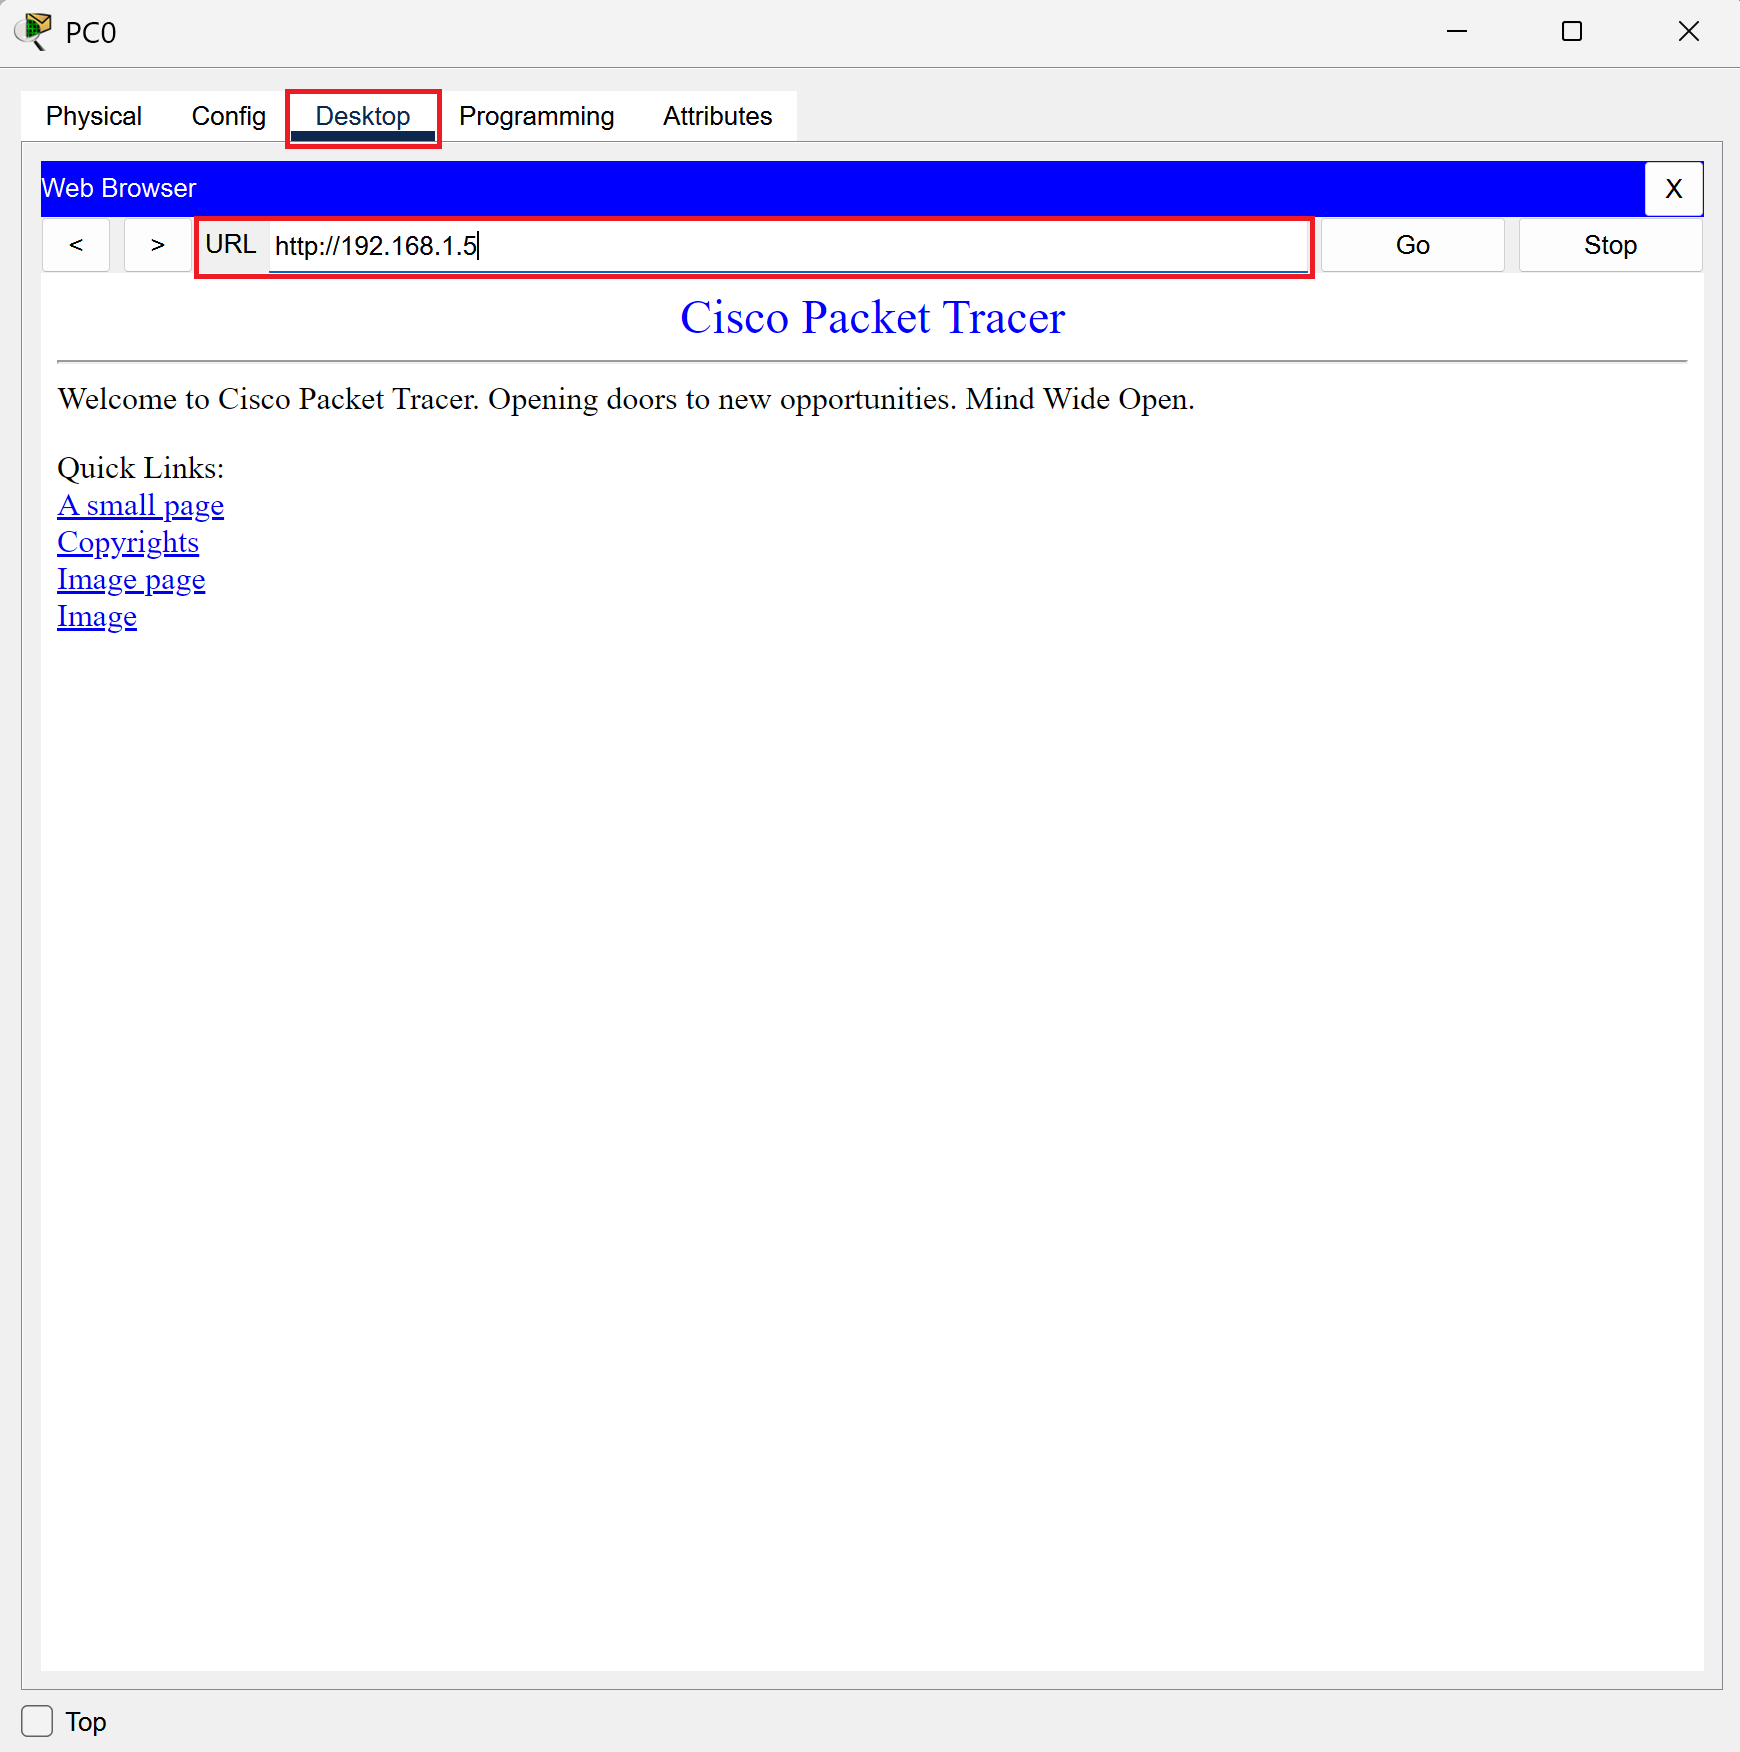
Head to the first PC and go to desktop and then browser. Type http://192.168.1.5 into the address bar and press enter or go. You should be able to connect and it looks like http is working! Woohoo!
Next, head to the second PC and go to desktop and then browser. Type https://192.168.1.10 into the address bar and press enter or go. You should be able to connect and it looks like https is working! Woohoo, we’re secure!

It Is Finished
Mission accomplished! Congratulations! You have followed along and we have set up http and https! It wasn’t too hard and now you know the basic premise of how to do this.
In the future when you’re setting up a website or you’re browsing make sure that HTTPS is enabled. It’s more secure and you can breathe easier knowing that your information is safe. If you input sensitive information such as your credit card or banking info into a HTTP website then attackers can intercept that information and you’ll have a really bad time.
Thanks for following along and hopefully this helped!