What is SNMP?
Have you wondered what SNMP is? Well I have the answer for you! SNMP is a protocol used in networking that allows for monitoring and managing network devices. This allows network administrators or in this case you, to gather diagnostic data and other information about their network. It’s an efficient way to gather data that can be used for troubleshooting and other tasks.
Let’s Get Started!
Today we’re going to set up SNMP in a simple network so you can see how to get started and how it works. We’re going to be using Cisco Packet Tracer and it’ll be simulating what you can do with actual hardware that you may have at home. Let’s go!

Network Creation
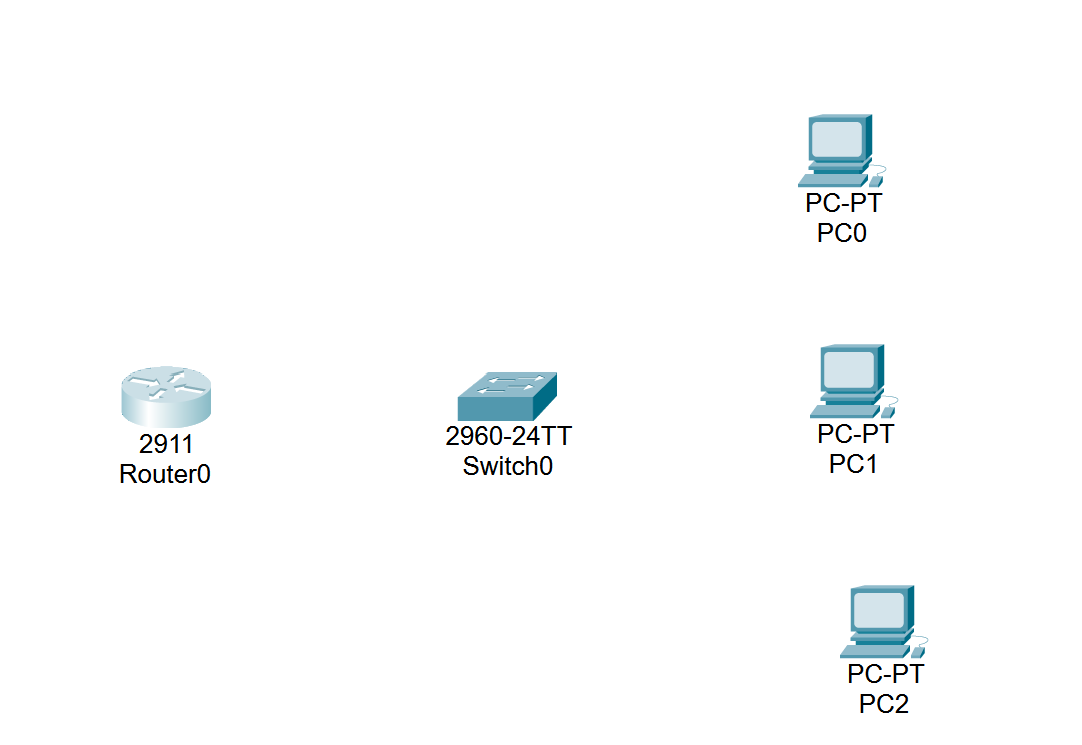
We’re going to get started by setting up a small network. This will consist of 3 PC’s, a switch, and a router. Drag these onto your canvas in any format you desire.
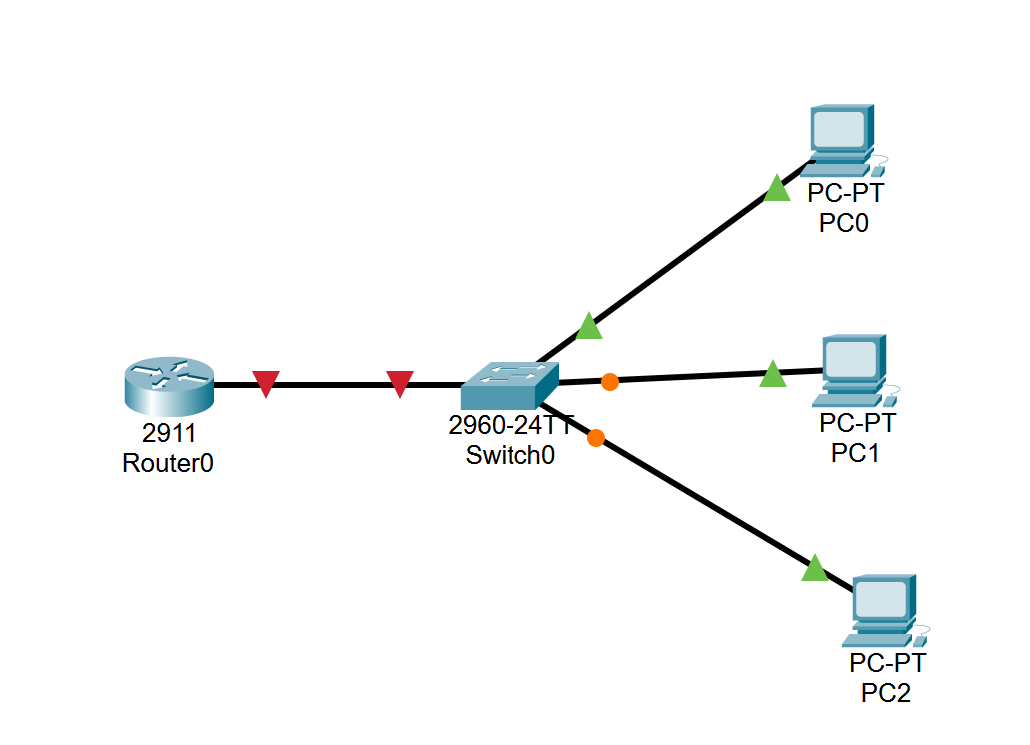
Next we’re going to connect our devices together. Head to the connections tab and select automatically choose connection type. Connect your router to your switch, and then connect all 3 PC’s to your switch.

After you connected them, it should look similar to this.
Configuration Conundrum
Next we’re going to configure our devices by assigning IP addresses to them. We’re going to assign IP’s to our 3 PC’s and then to our router.
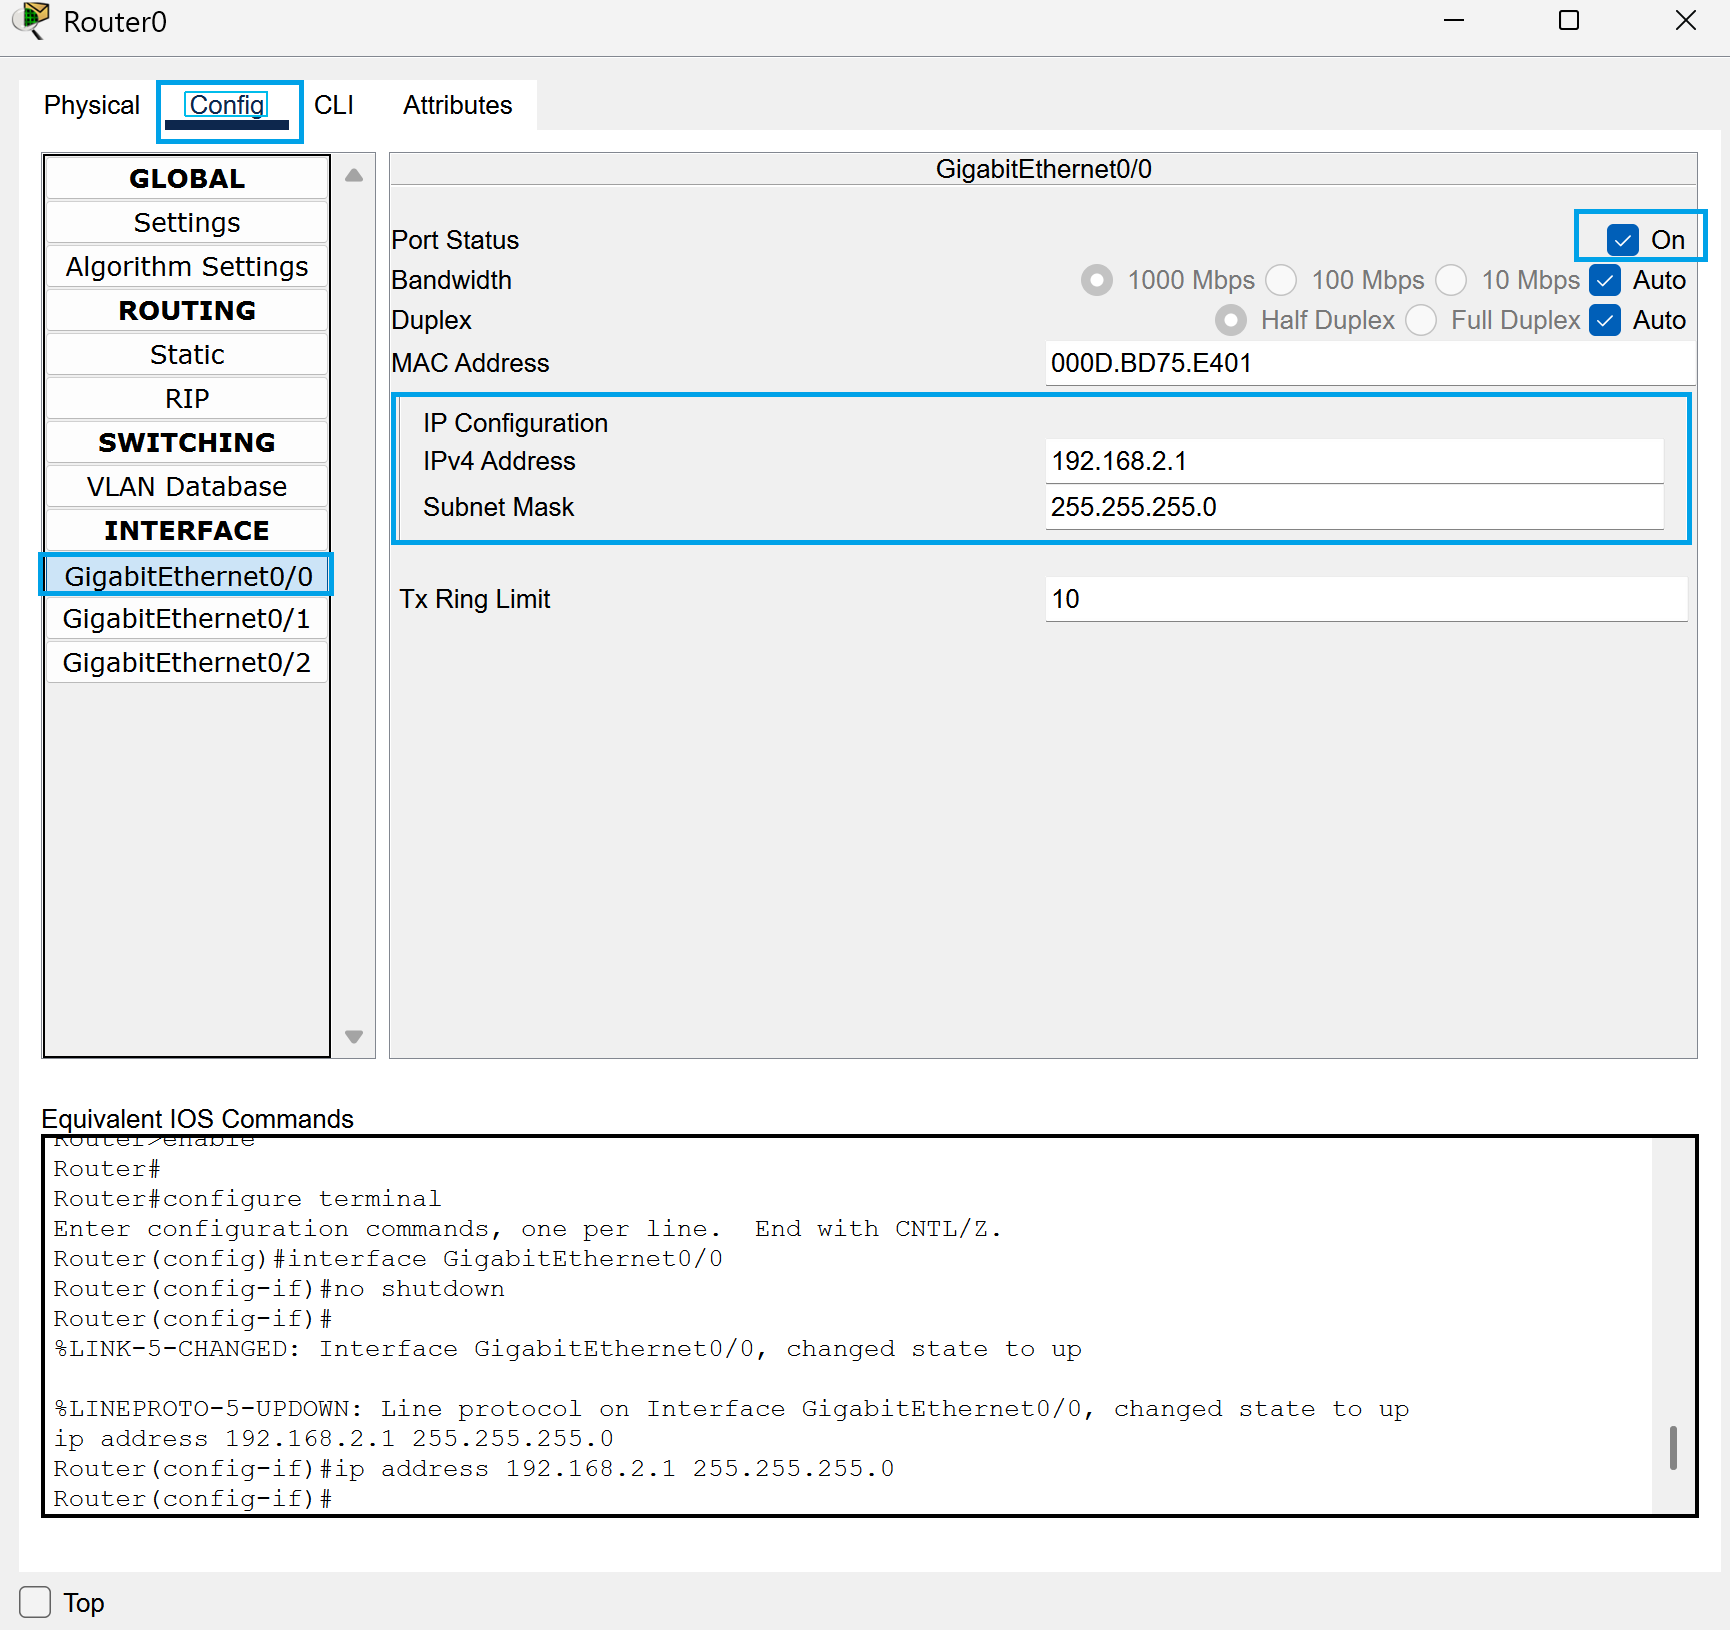
First, head to the router and head to the config tab. Select gigabitethernet 0/0 on the left under interface.
On the right, you’ll see port status. Check that box to on.
Next go to IPv4 and set the address to 192.168.2.1.
Set the subnet mask to 255.255.255.0.
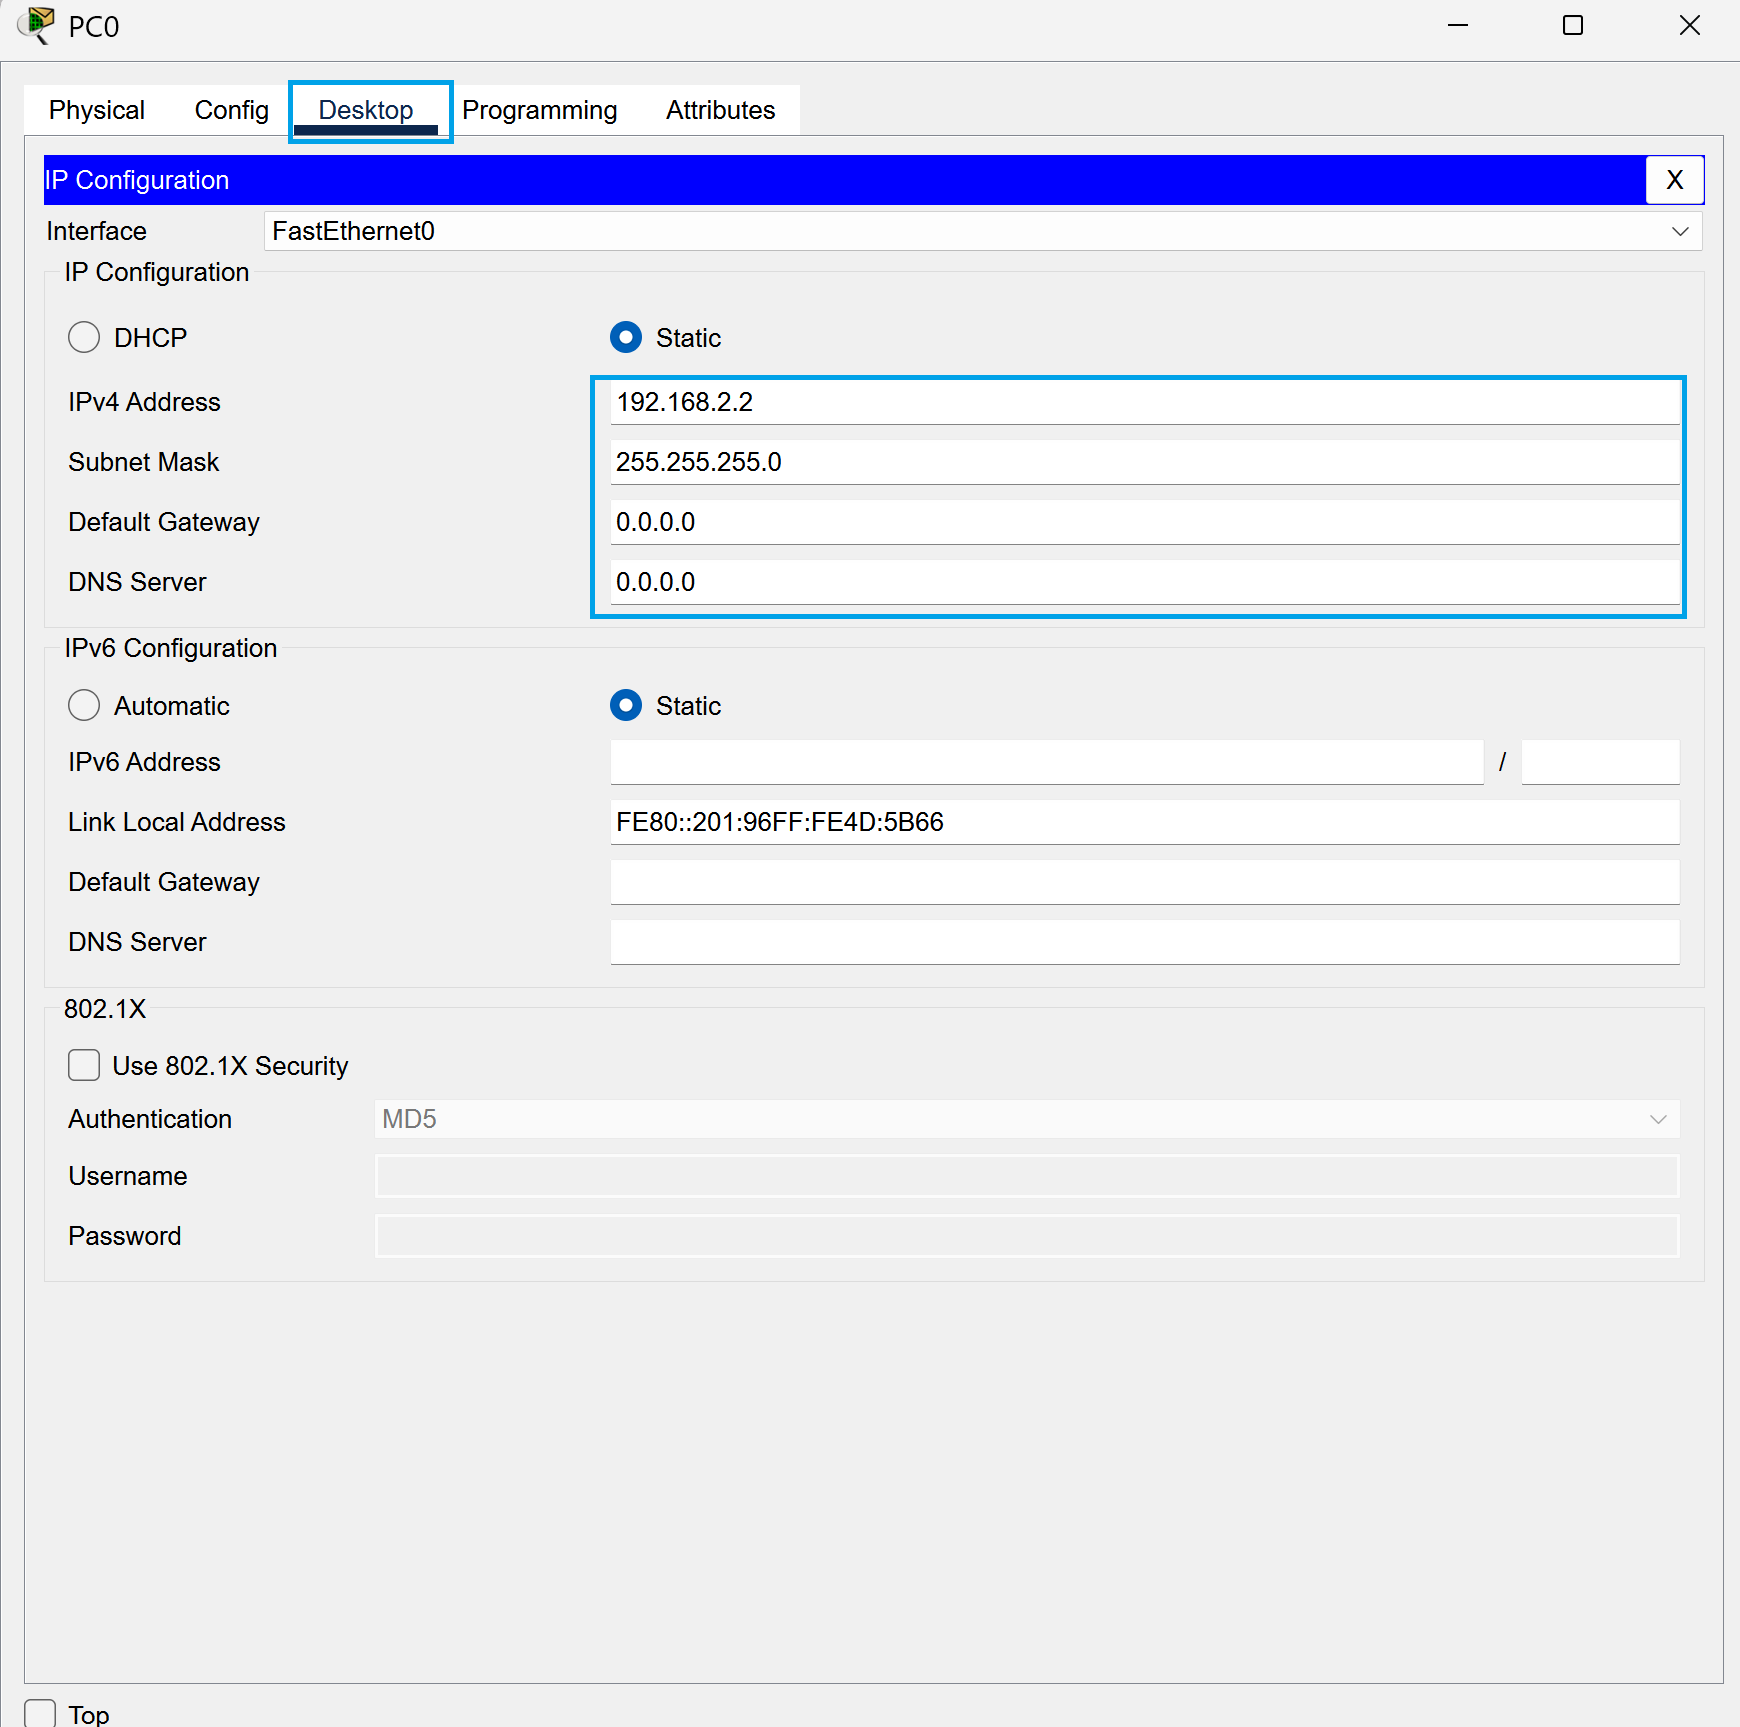
Next, head to the first PC and go to ip configuration under the desktop tab.
Next go to IPv4 and set the address to 192.168.2.2.
Set the subnet mask to 255.255.255.0.
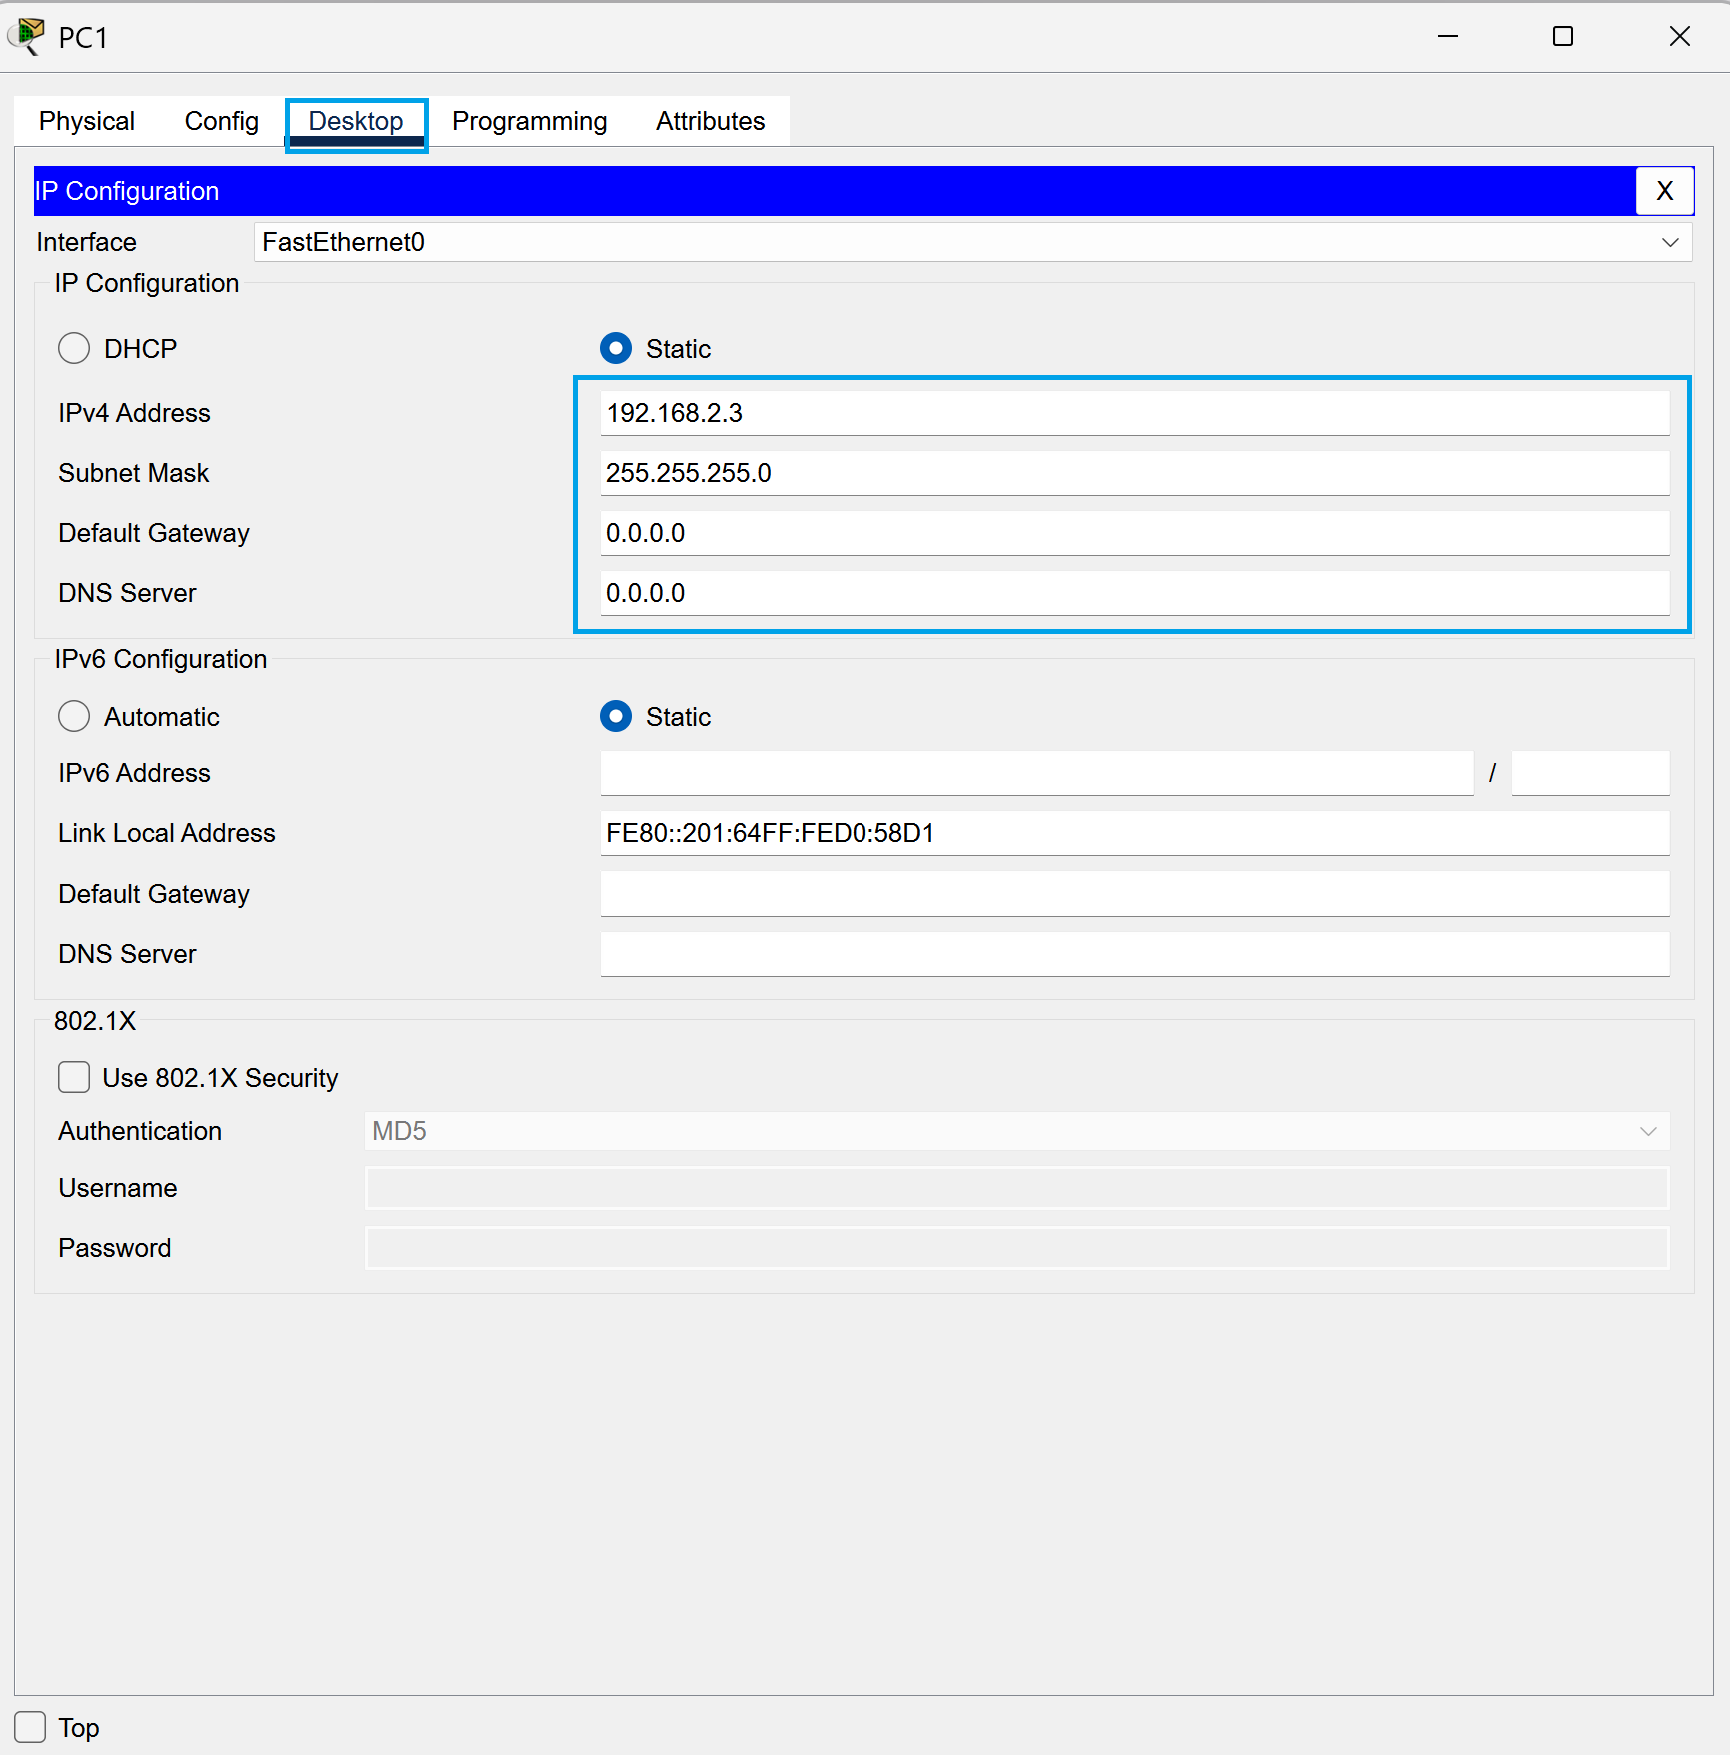
Now head to the next PC and repeat the process.
Next go to IPv4 and set the address to 192.168.2.3.
Set the subnet mask to 255.255.255.0.
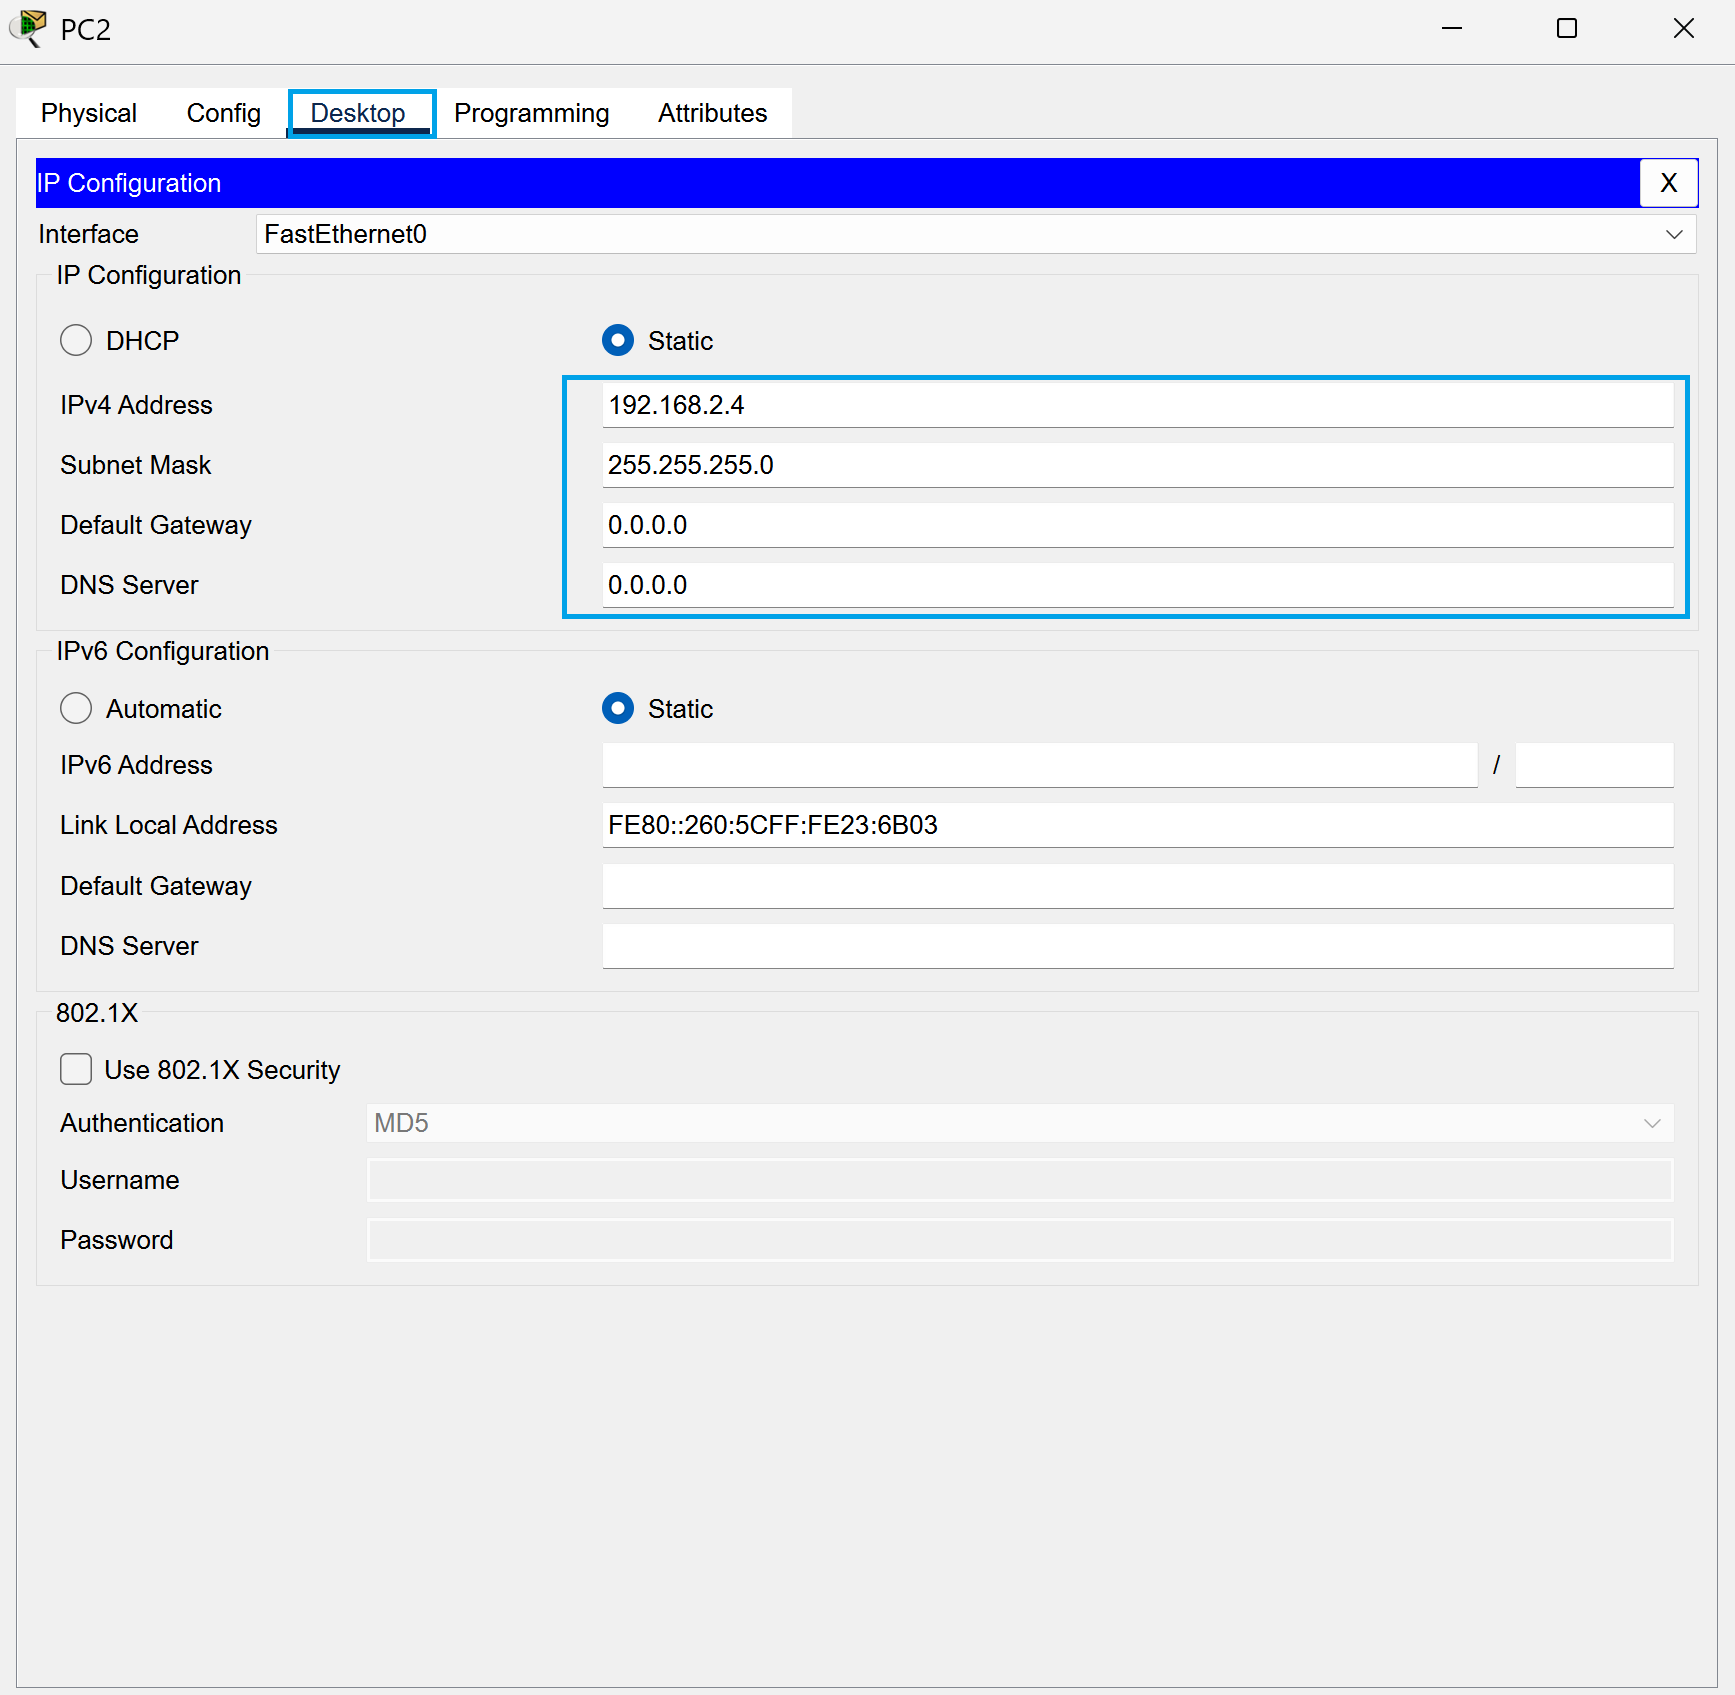
Finally, head to the last PC and repeat it again.
Go to IPv4 and set the address to 192.168.2.4.
Set the subnet mask to 255.255.255.0.
It’s CLI Time
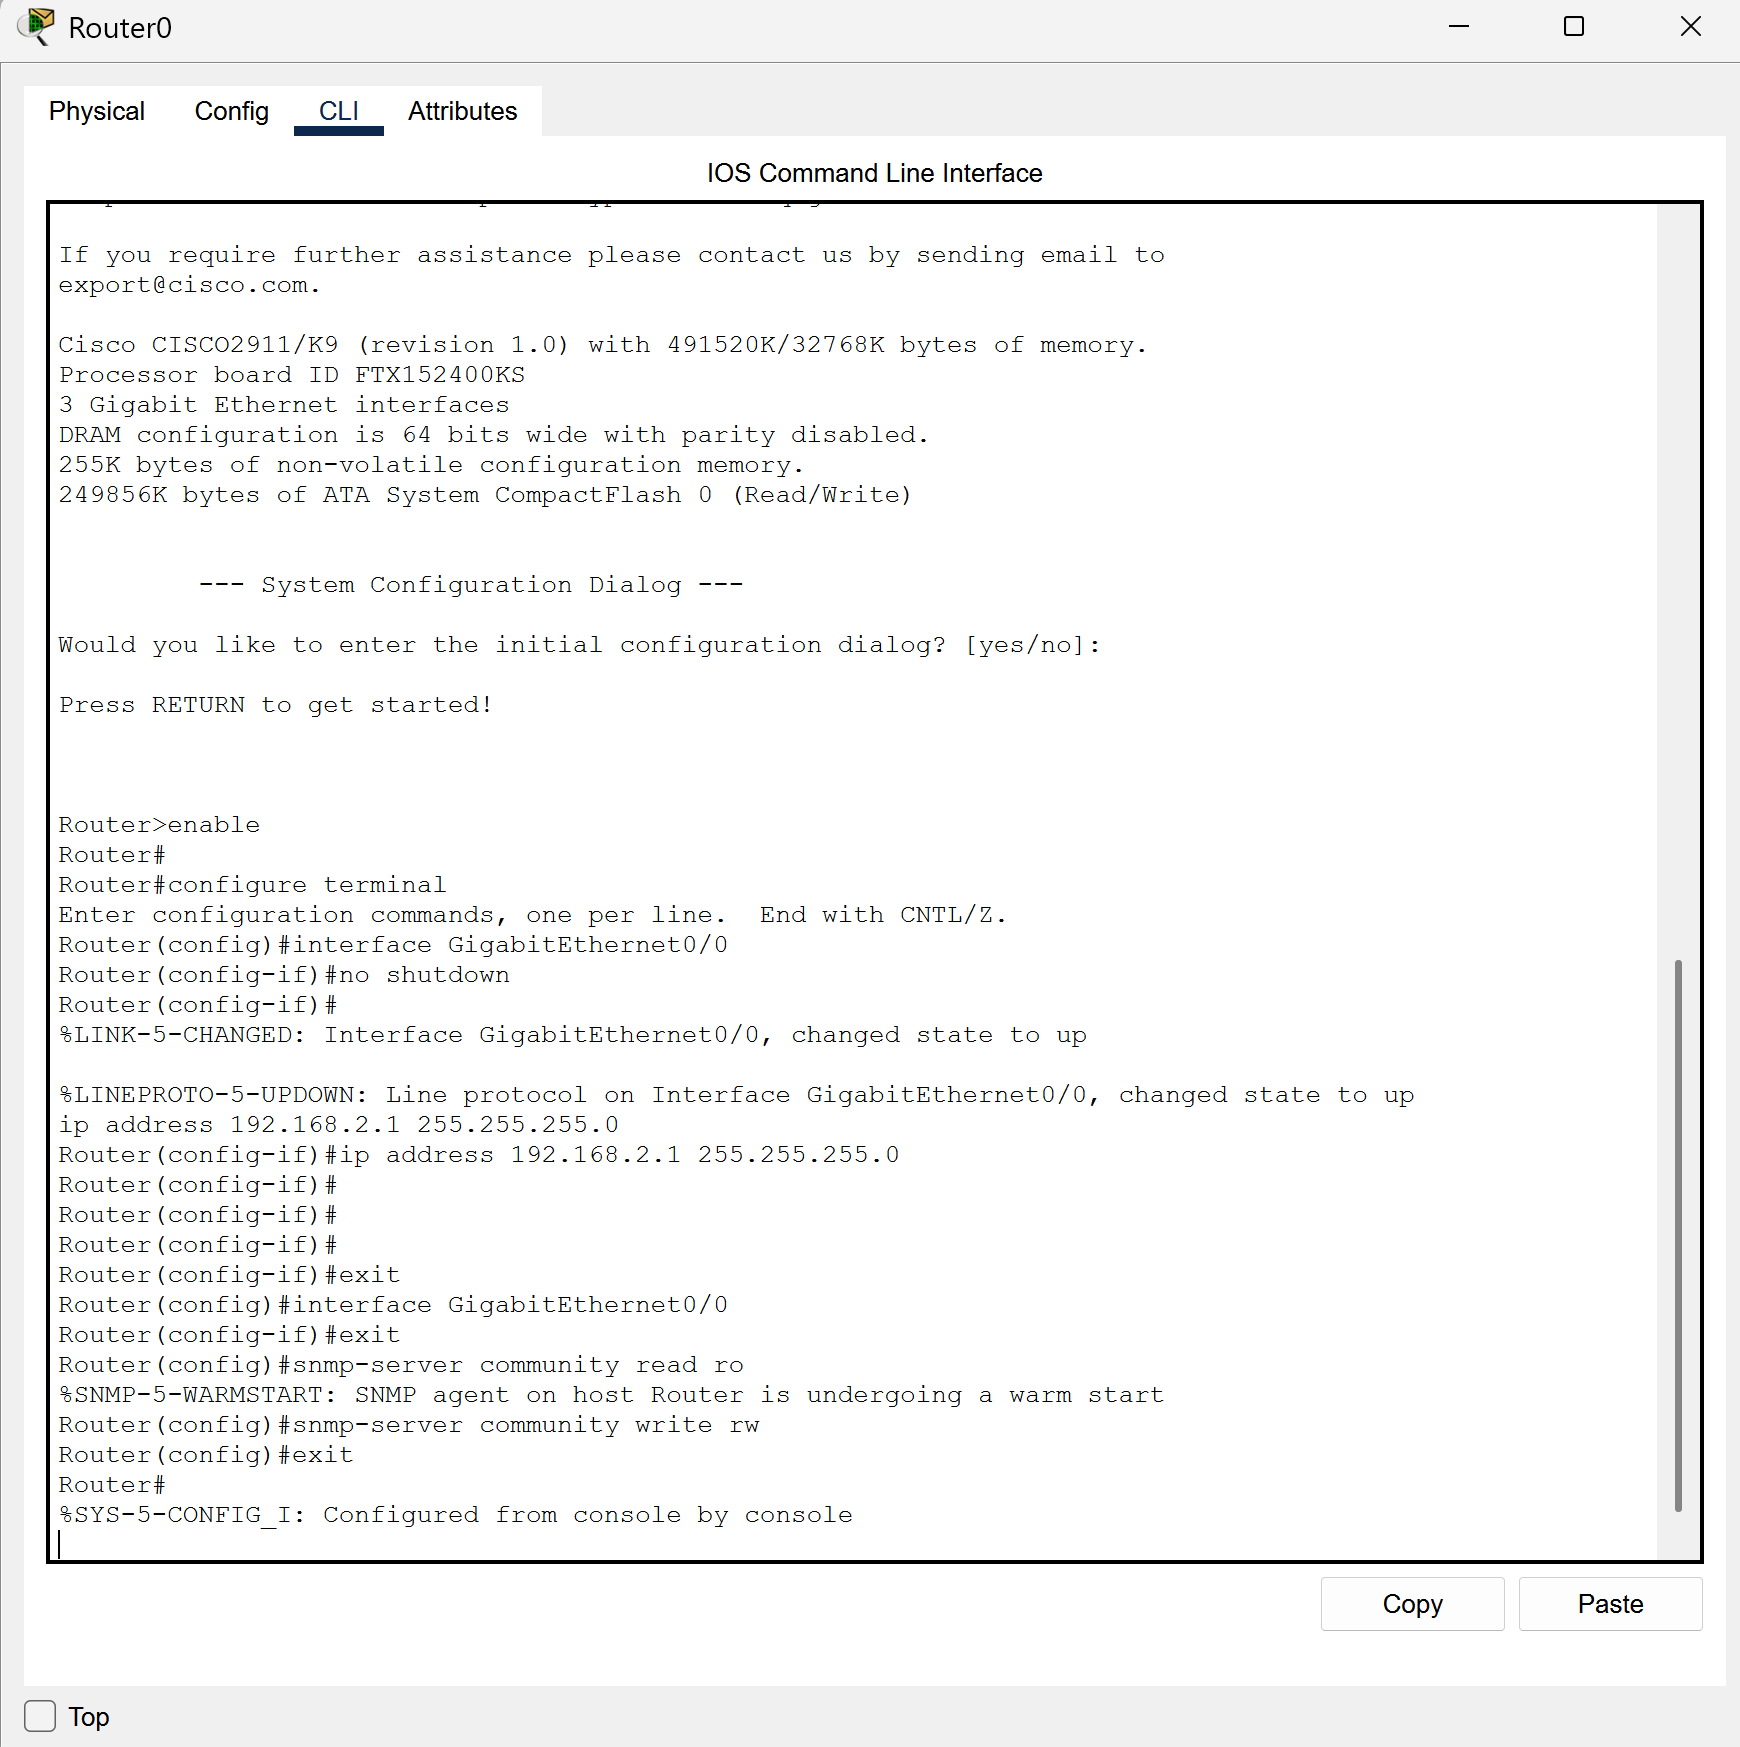
Now we’re going to head into our router and check out the CLI tab. This is where we’ll start configuring SNMP.
We’ll be using two commands today.
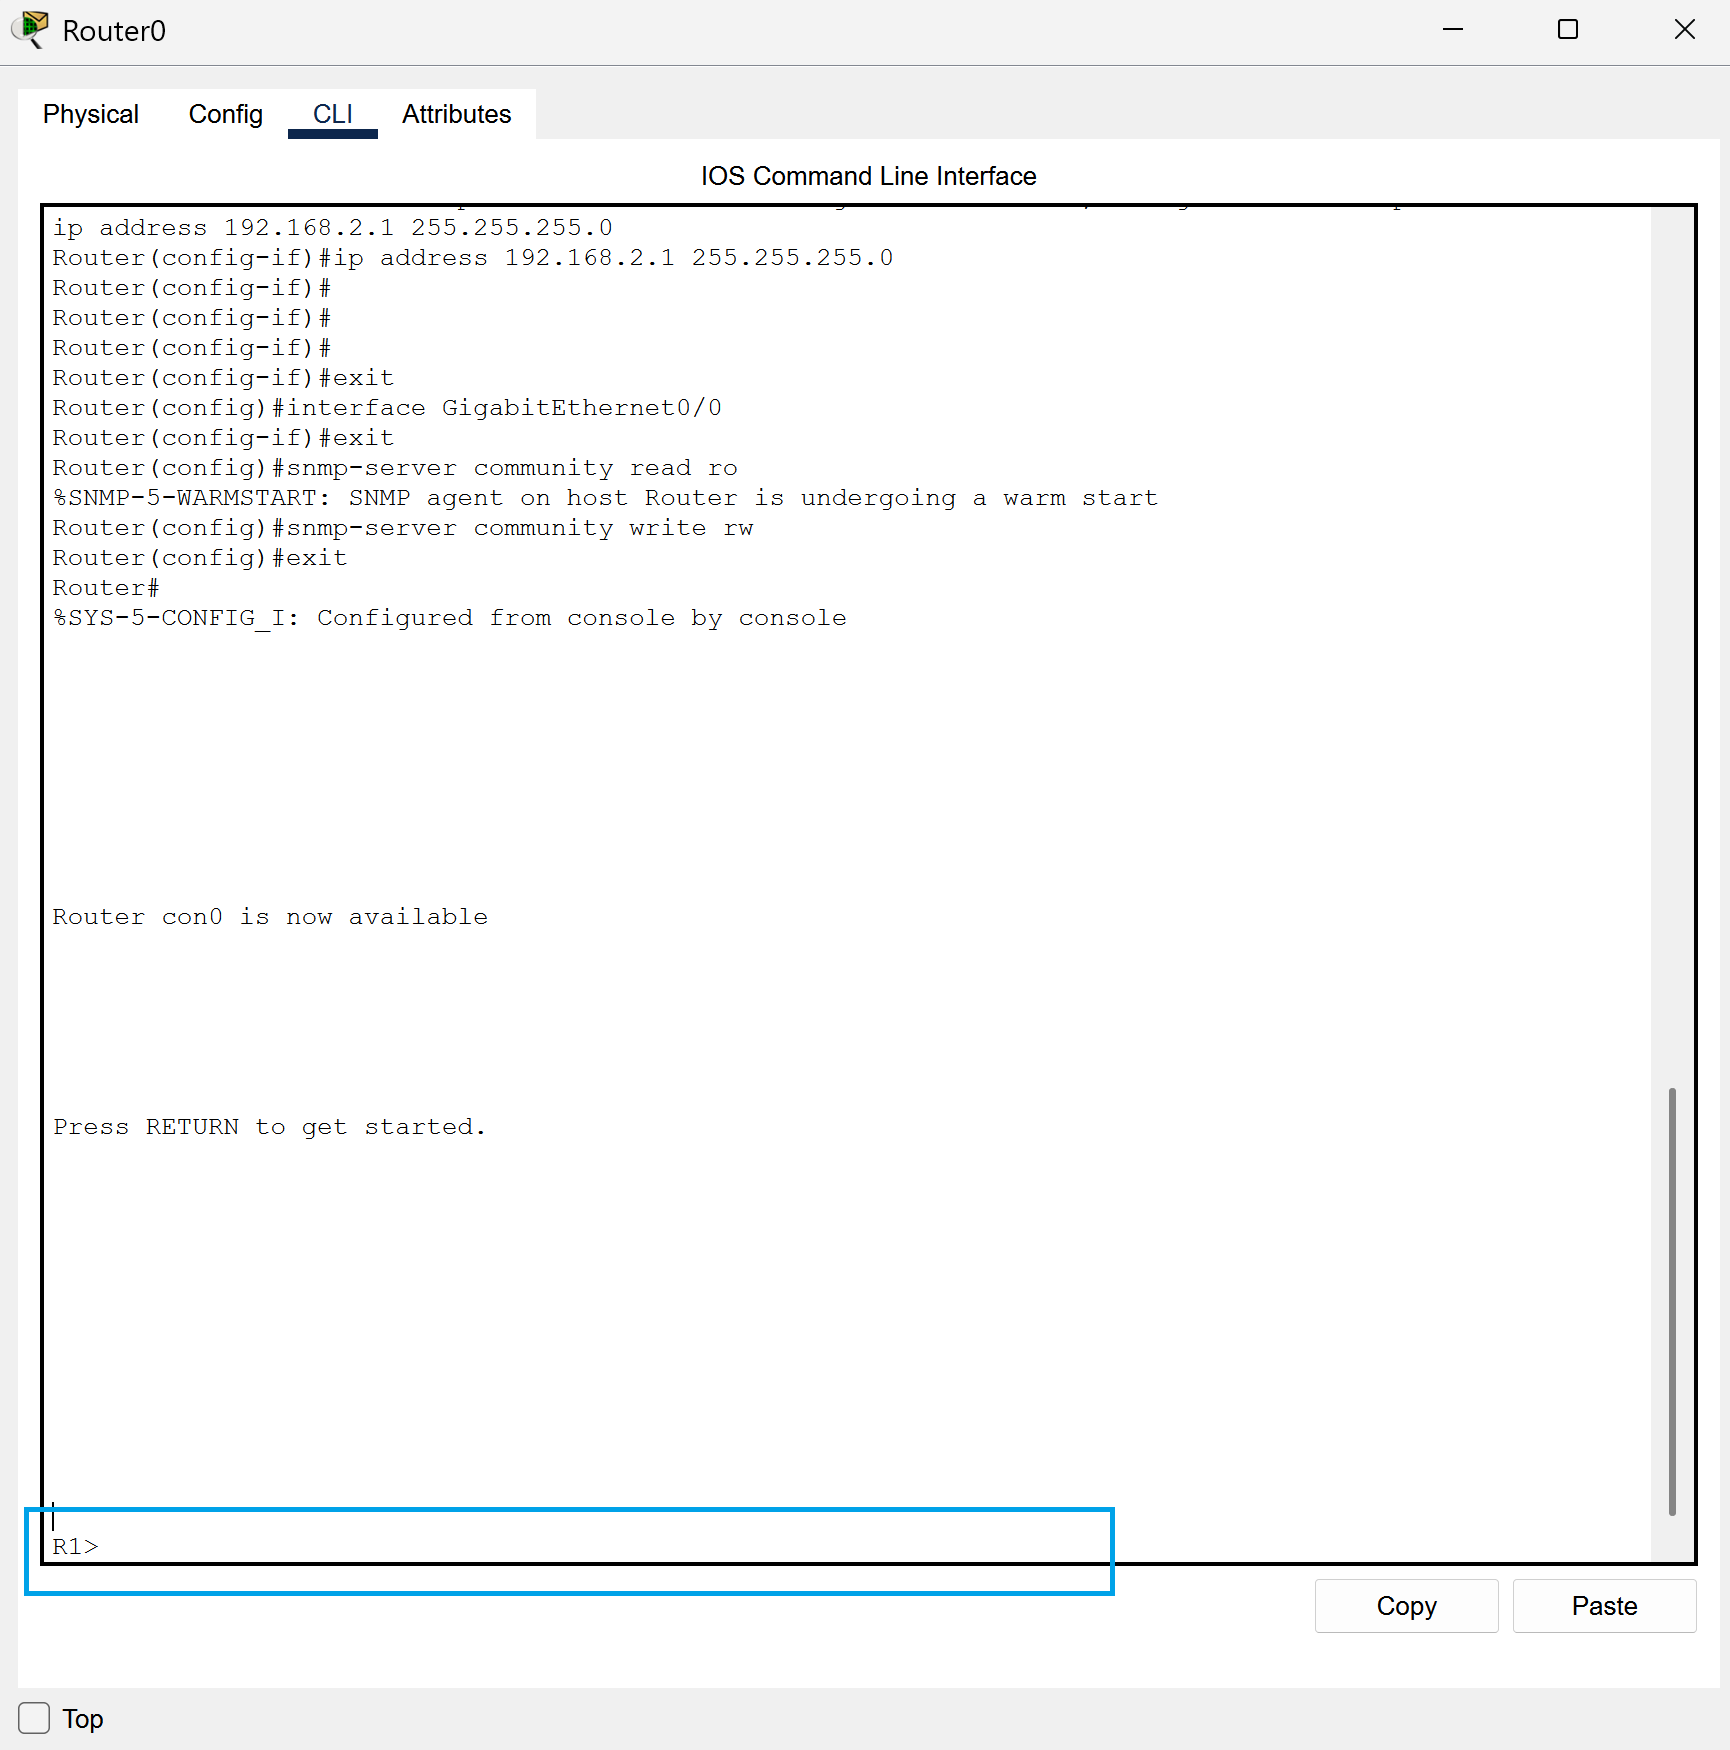
snmp-server community read ro
snmp-server community write rw
Copy over my inputs from the CLI box to know which order to put them in.
Time to Browse
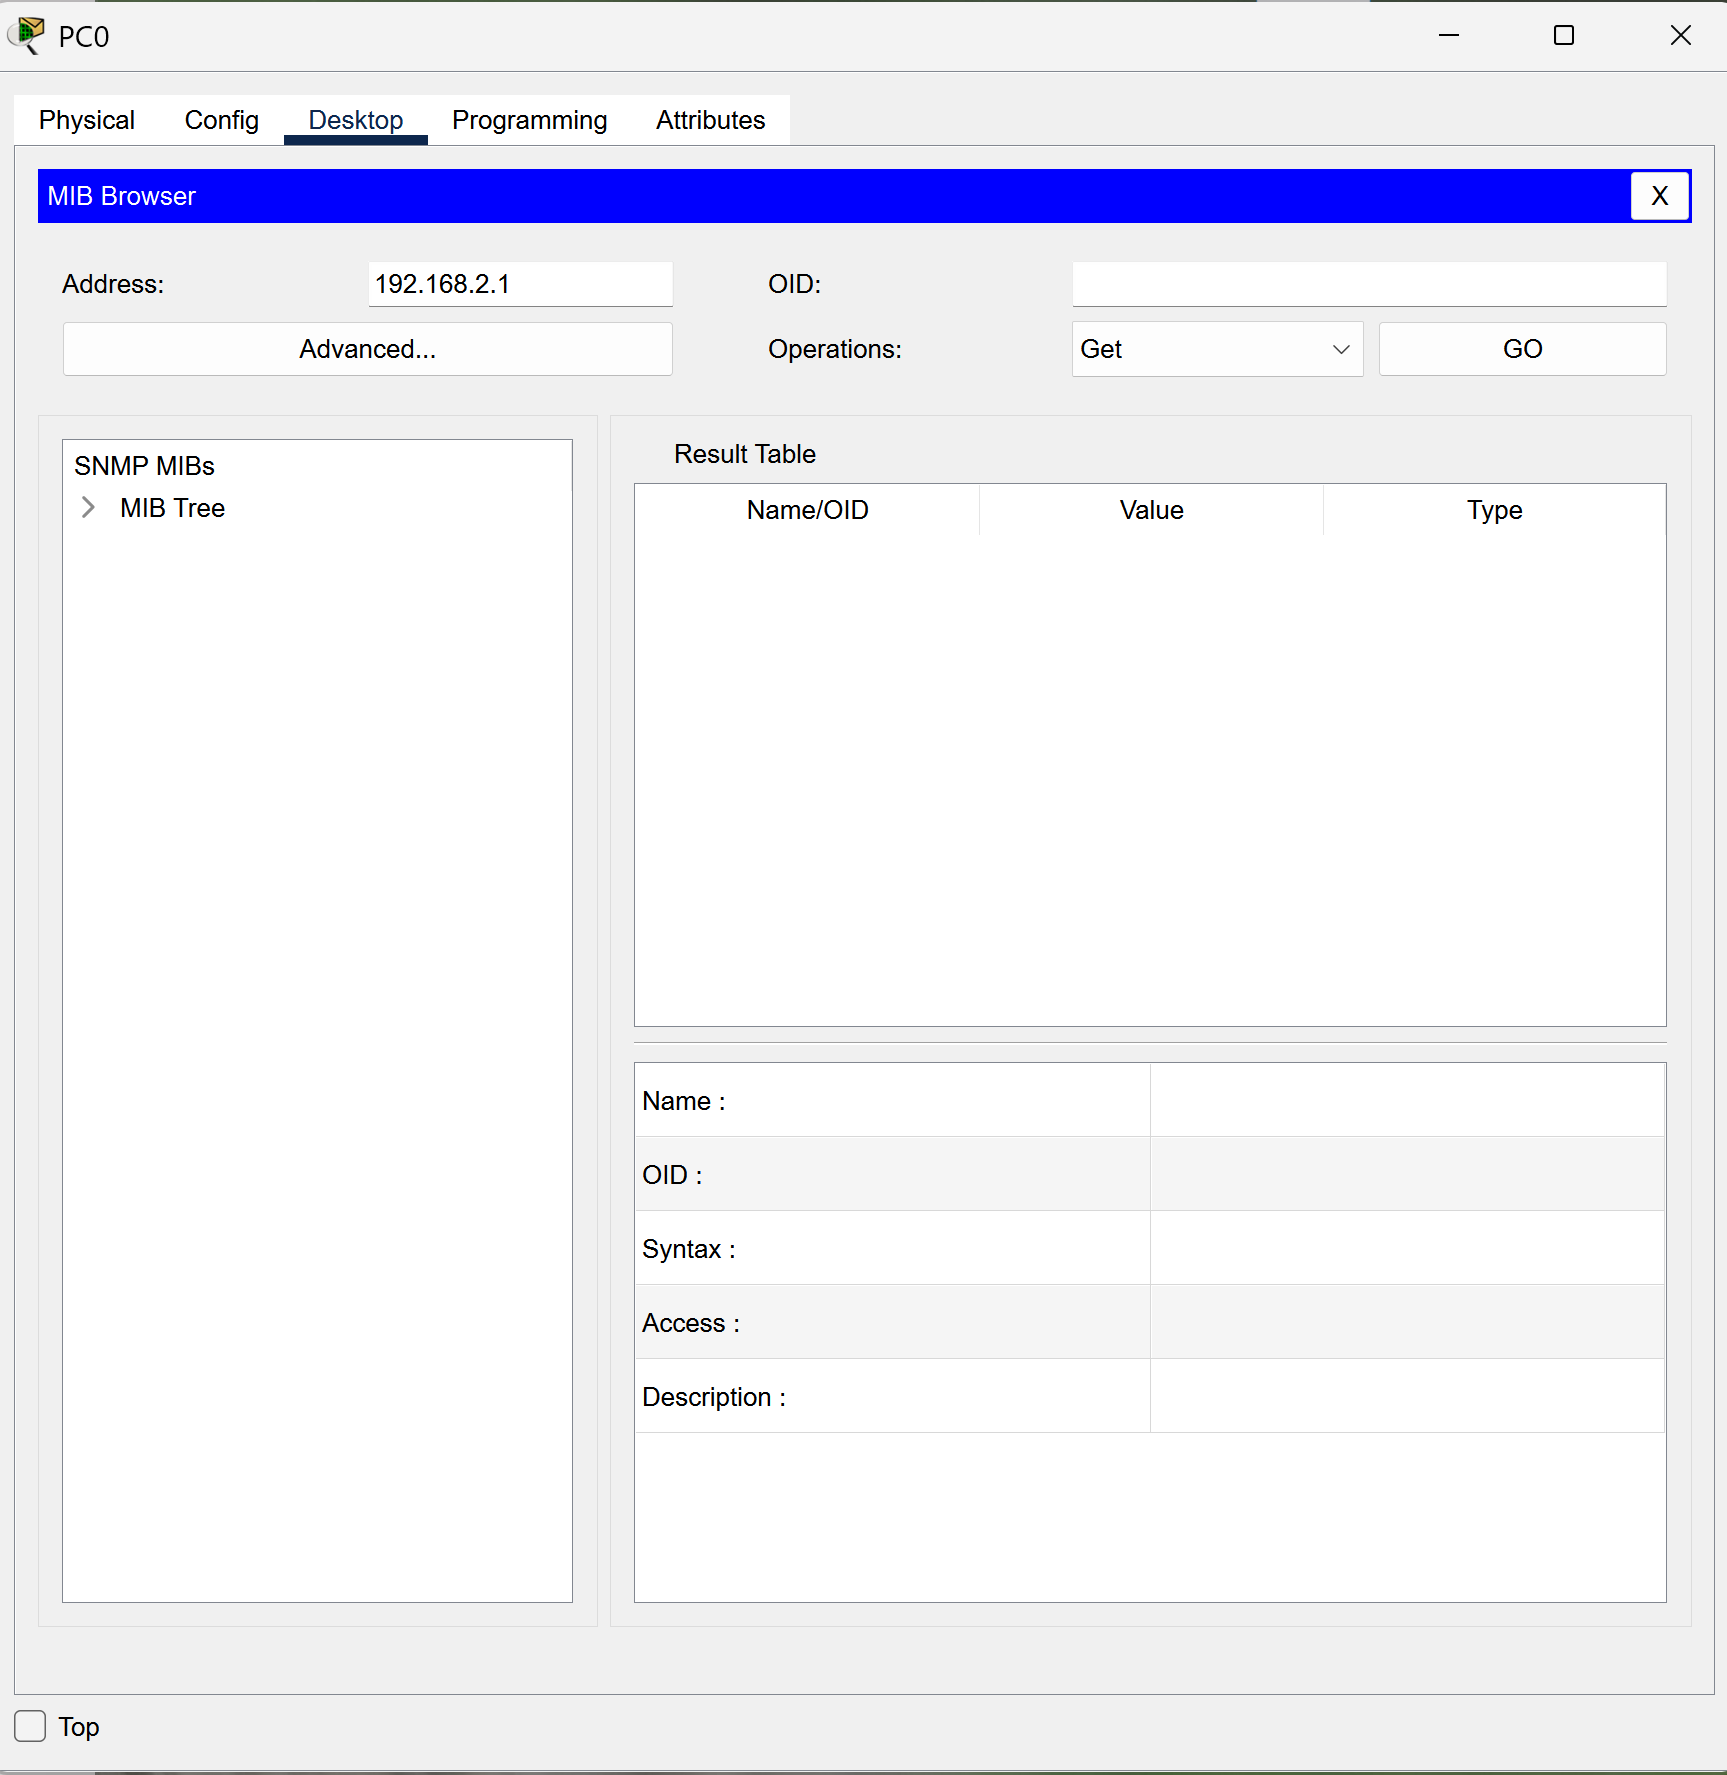
Head into your first PC and go to MiB browser.
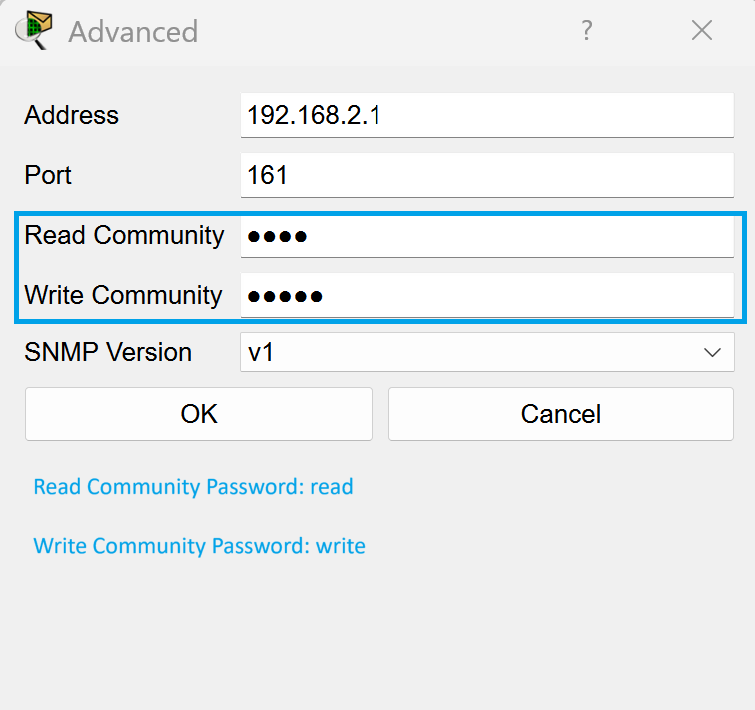
In the address bar type in 192.168.2.1 and then select the advanced box.
Now in the read community box, type read as the password.
In the write community box, type write as the password.
Yes, very original, I know.
Now, this might get a little tricky. You’ll see a tree on the left with little arrows under it. Keep clicking arrows until you come to a system drop down and you see .sysName.
You will see an OID number that popped up in the top right box. Press go!
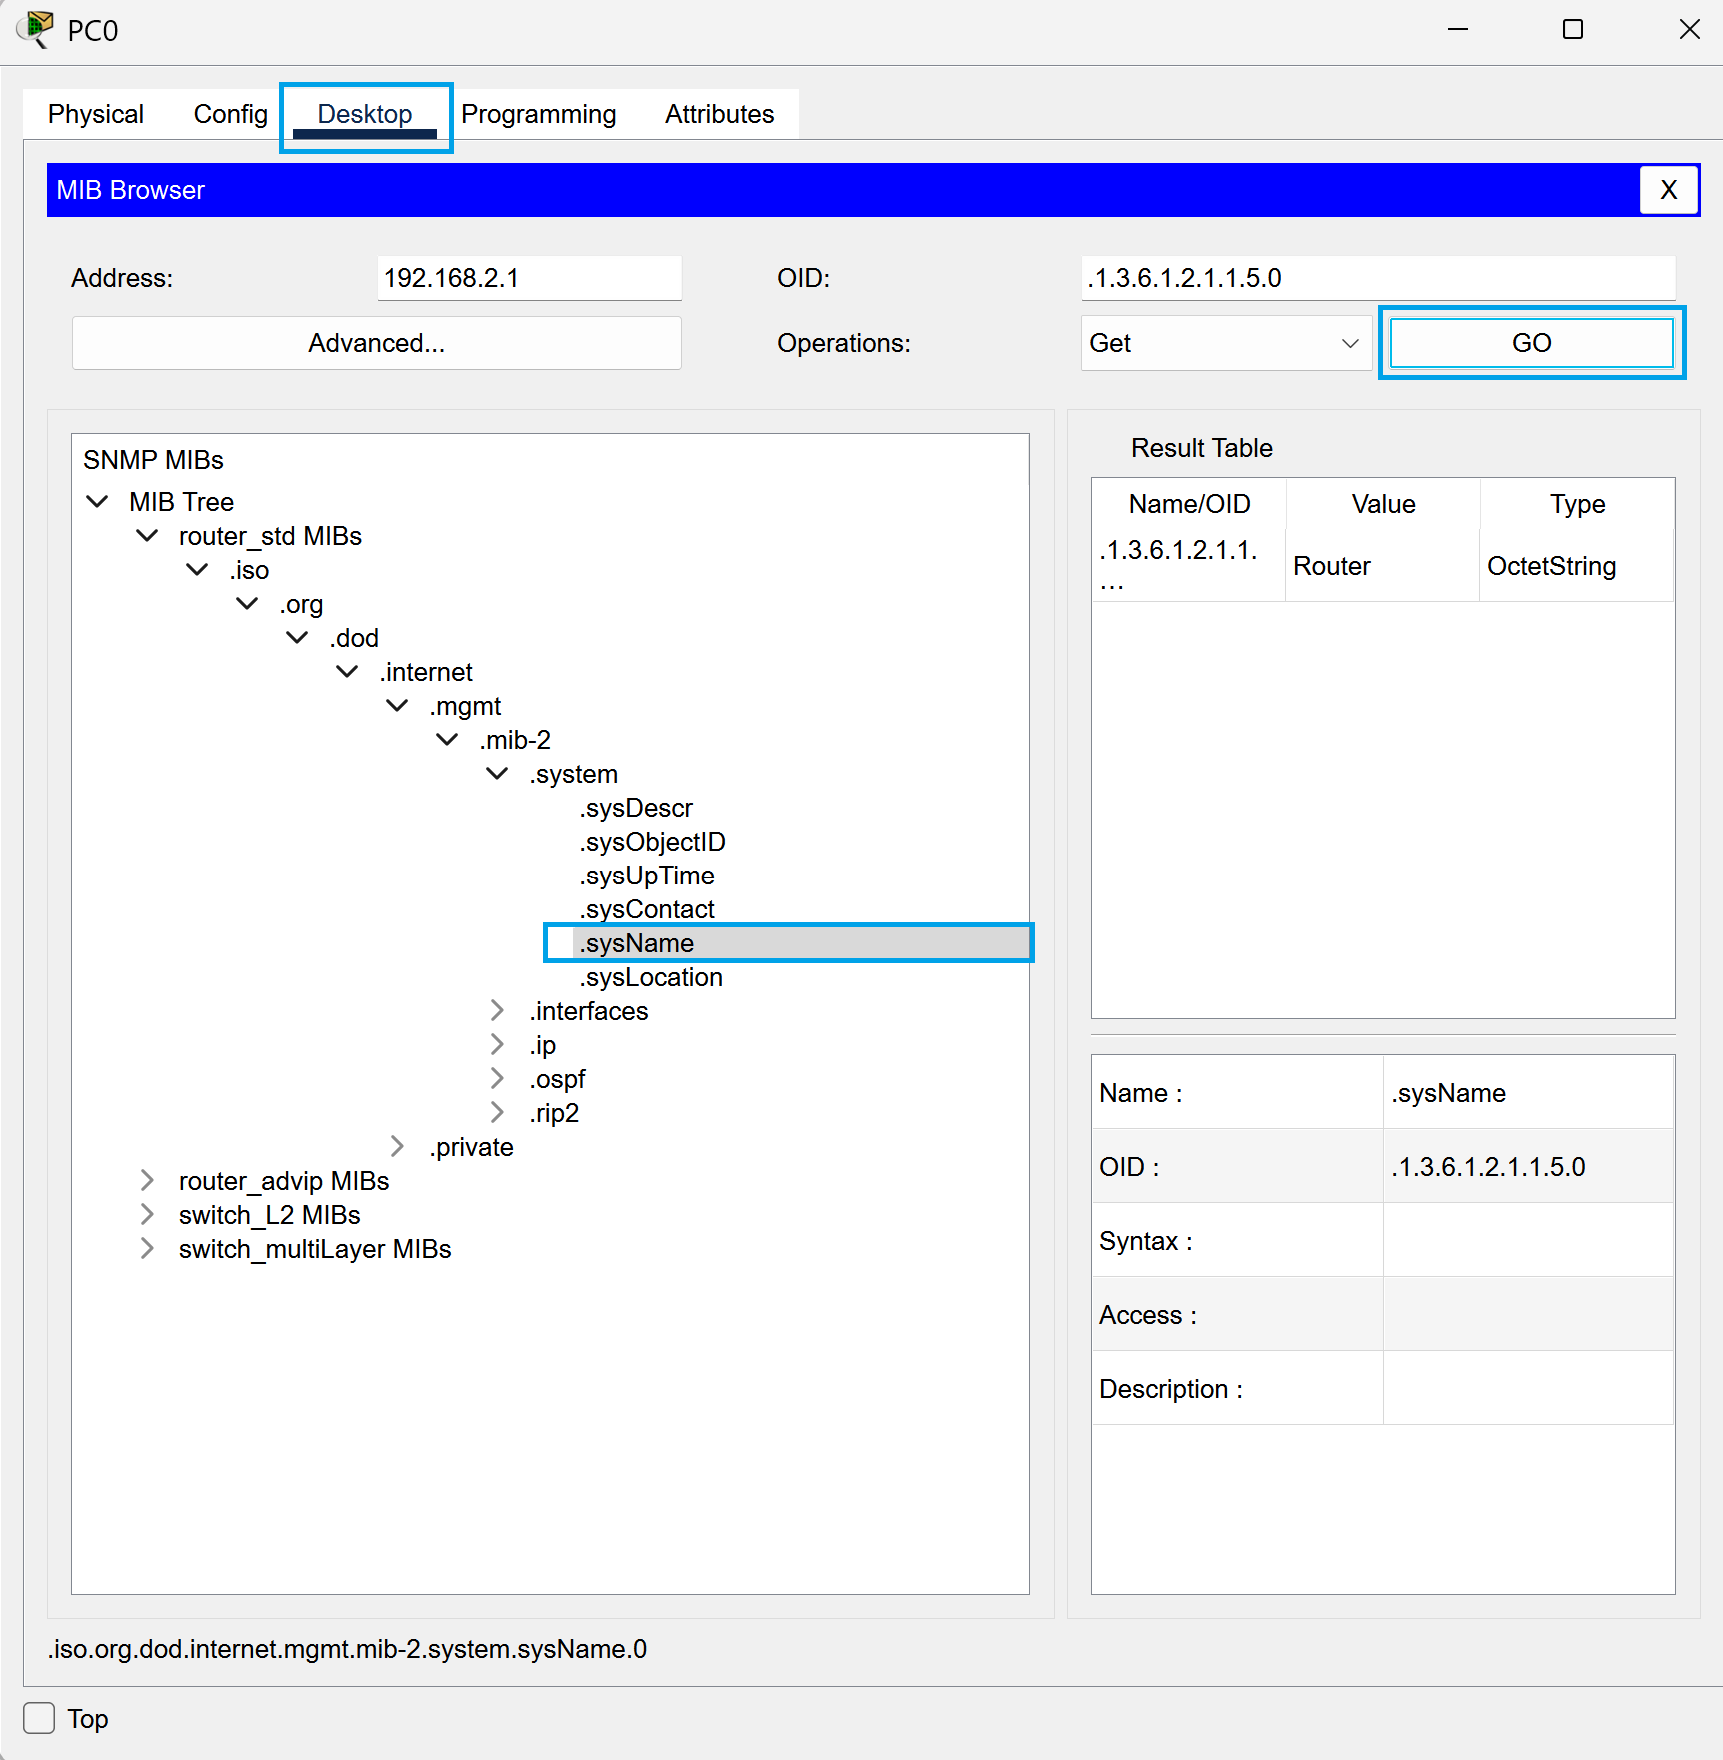
Now you’ll see a box that says Get. Press that box and you’ll see a drag down box appear that has Set in it.
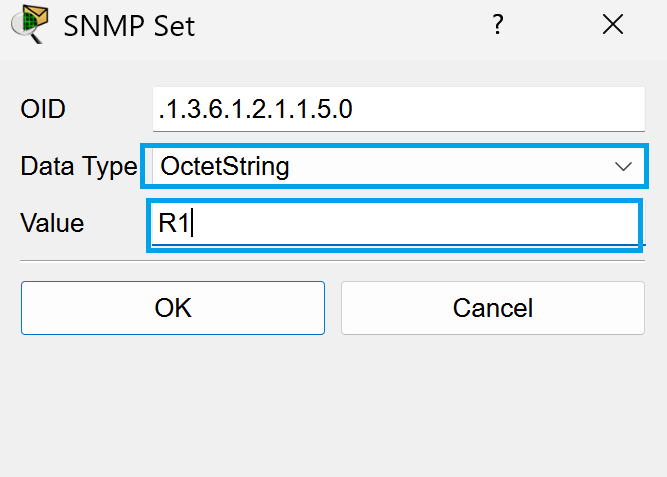
Another box should then pop up and you should see data type and in this you’ll change it to OctetString.
After that, change the value in the value box to whatever you desire. In my case I put R1 for a value that’s easy to remember.
Time to Check!
Now we’re going to open up the CLI tab in our router to see if it worked. In my case it shows R1 which shows that we are successful! Woohoo!
It Is Finished!
We have now successfully set up SNMP in our network! This tool gives us the ability to monitor different devices in our network, in this case our router. You can add more devices to monitor if you desire but I decided to keep it simple so I can show an easy and practical option. One can only imagine how complicated it can get if you have hundreds of devices in a network. Anyway, great job and congratulations! Keep exploring and seeing what else you can do with SNMP!